 Pin It
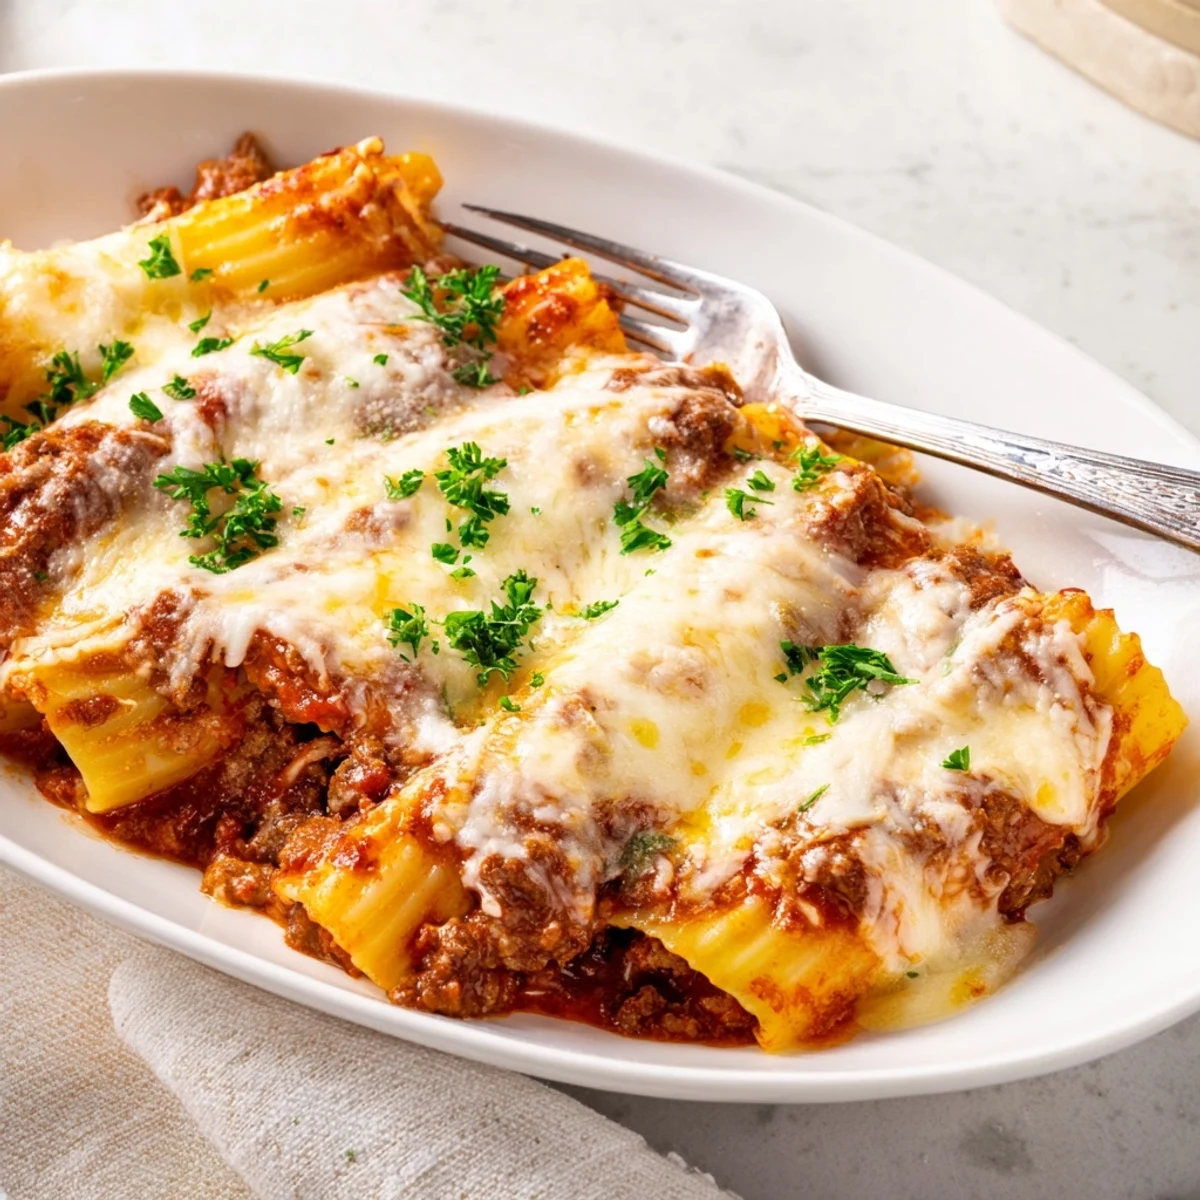
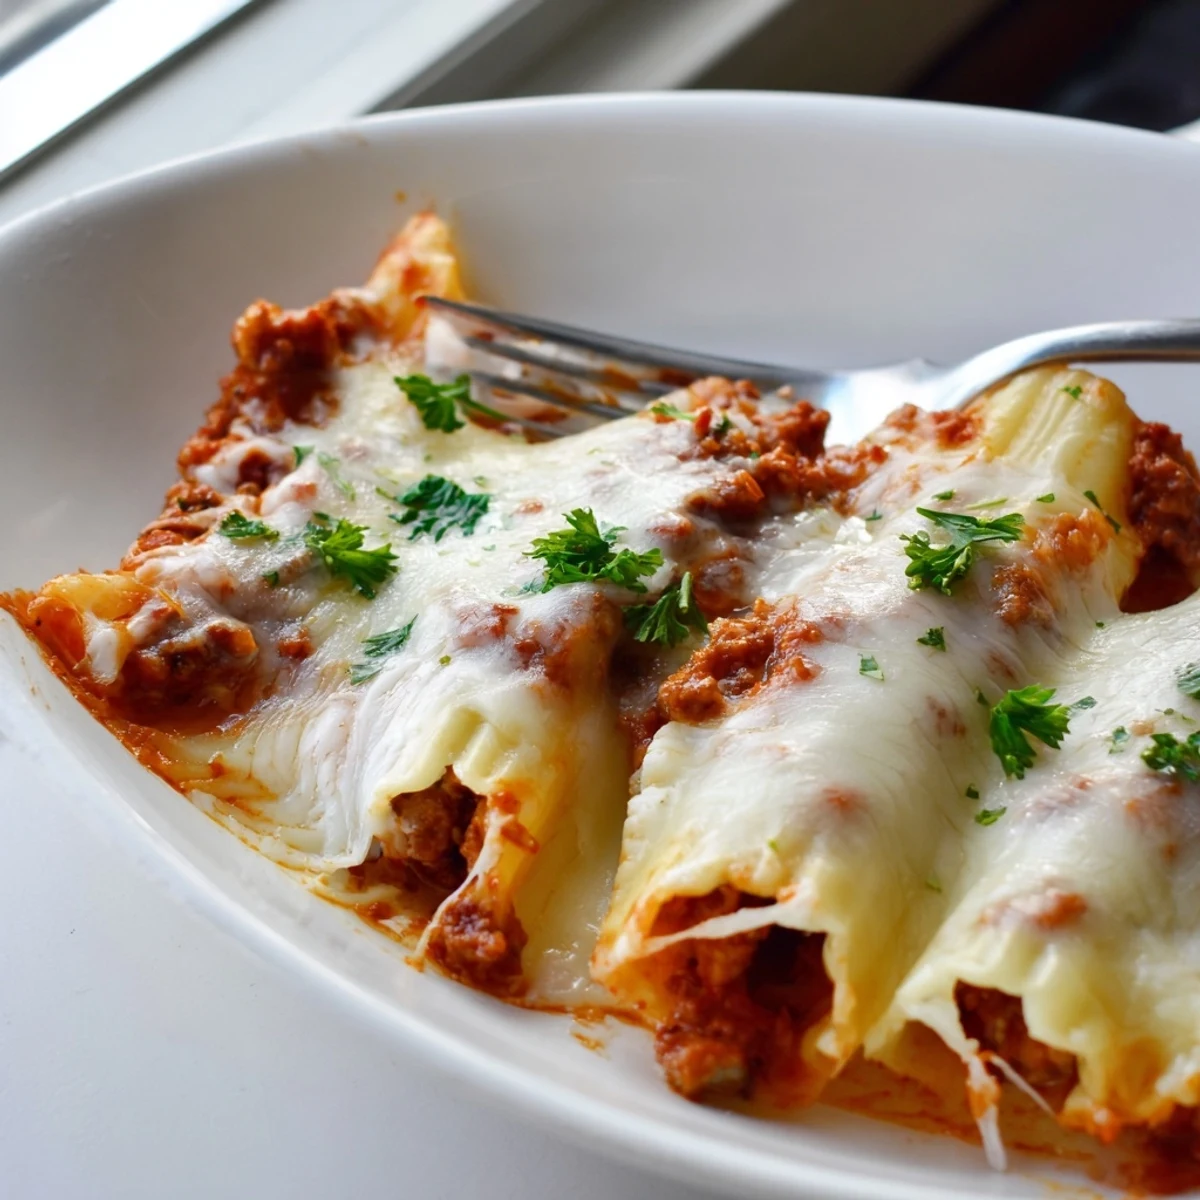
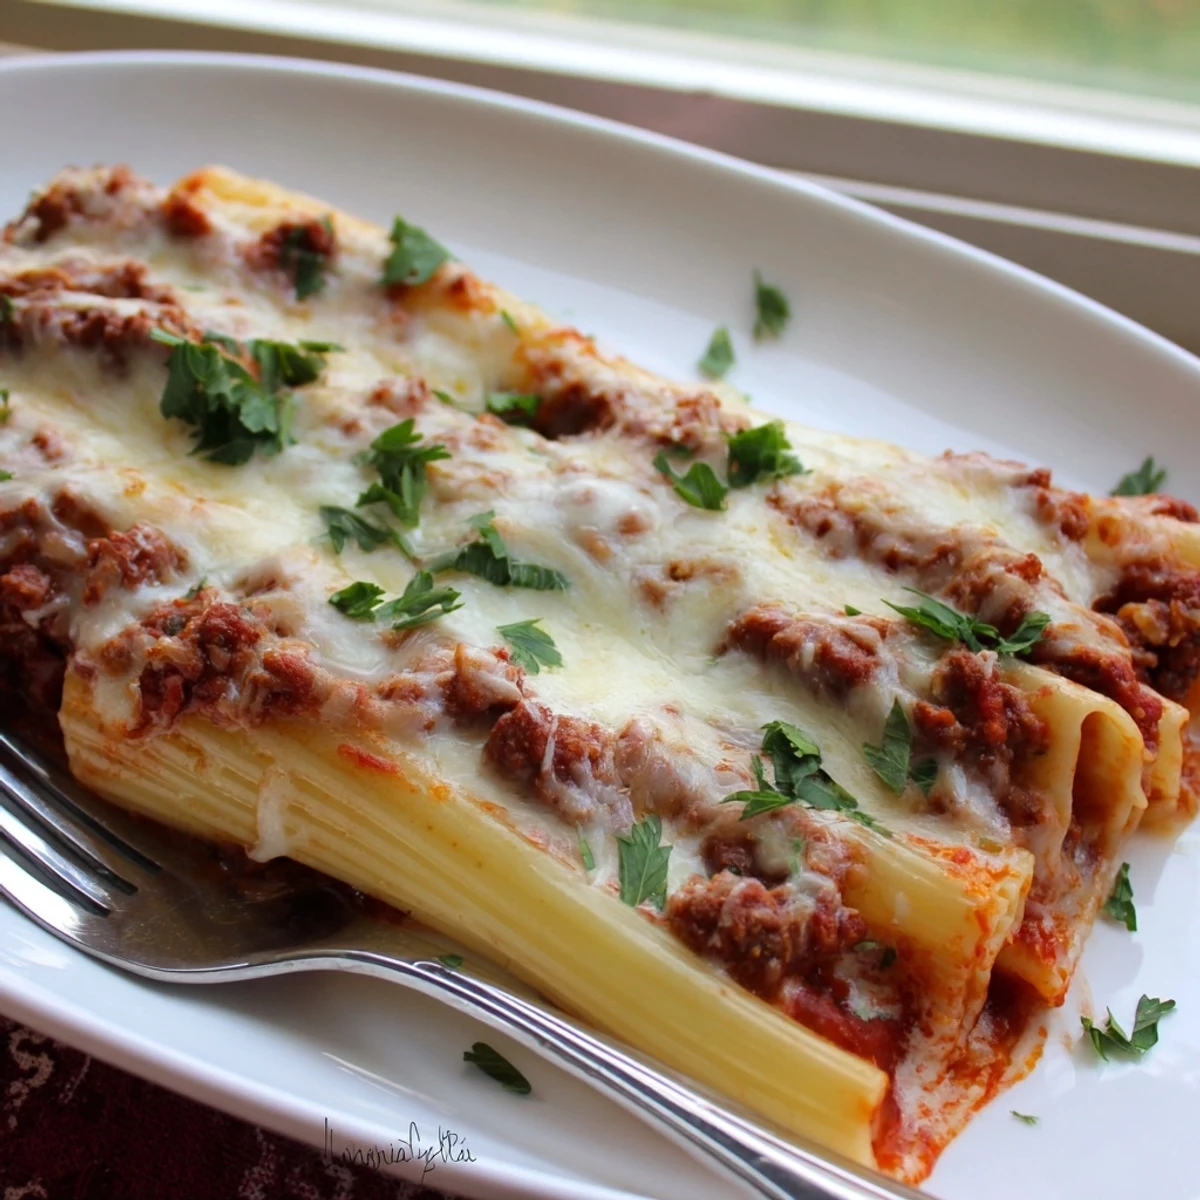
 These tender manicotti tubes are generously filled with a smooth ricotta-based cheese mixture blended with mozzarella, Parmesan, and a hint of nutmeg. The stuffed pasta is nestled in a hearty meat sauce made with ground beef, crushed tomatoes, and aromatic Italian herbs, then baked until the cheese topping turns golden and bubbly. The dish balances the creamy, mild interior with the robust, savory tomato-based sauce, creating layers of texture and flavor that define traditional Italian comfort cuisine.
The first time I made manicotti, I learned that cheese explosions in the oven are actually kind of beautiful in their own chaotic way. My kitchen smelled like an Italian grandmother had moved in, and my husband stood by the oven watching those pasta tubes bubble and brown like it was the most fascinating television he had ever seen. Now this recipe is our Sunday evening fallback, the one we make when we need something that feels like a hug from inside out. The secret is letting that meat sauce simmer until it knows exactly what its supposed to taste like.
Last winter my sister came over during a snowstorm and we made this together while drinking cheap wine and talking about everything and nothing. She kept trying to sneak extra cheese into the filling when she thought I wasnt looking, and I pretended not to notice because shes right about cheese. Now whenever she visits she asks if were making the snowstorm pasta, which is what she calls it because apparently food memories attach themselves to weather.
Ingredients
- 1 tbsp olive oil: Creates the foundation for your sauce base, use something you actually like the taste of
- 1 medium onion, finely chopped: Adds sweetness and depth, take your time getting them translucent instead of rushing to brown
- 2 garlic cloves, minced: Fresh garlic makes all the difference here, do not even think about using the prechopped stuff
- 1 lb (450 g) ground beef: The fat content matters, do not go extra lean or you will miss that richness
- 1 (24 oz / 680 g) can crushed tomatoes: Look for San Marzano if you can find them, they really do taste better
- 1 (15 oz / 425 g) can tomato sauce: Adds body without making it too chunky
- 2 tbsp tomato paste: Concentrates all those tomato flavors into something deeper
- 1 tsp dried basil: Dried works fine here since it will cook down in the sauce
- 1 tsp dried oregano: Classic Italian herb that makes everything taste like comfort
- ½ tsp red pepper flakes: Just enough warmth to make things interesting, leave it out if you are sensitive to heat
- 1 tsp sugar: Cuts the acidity and balances everything out
- Salt & black pepper: Season as you go, taste at every stage
- 1 (15 oz / 425 g) container ricotta cheese: Whole milk ricotta creates that velvety texture you want
- 1½ cups shredded mozzarella cheese: Low moisture mozzarella melts better without making things too watery
- ¾ cup grated Parmesan cheese: The salty counterpoint to all that mild cheese
- 1 large egg: Binds the filling together so it does not turn into a hot mess when you cut into it
- 2 tbsp chopped fresh parsley: Fresh adds brightness, but dried works in a pinch
- ¼ tsp ground nutmeg: The secret ingredient that makes people ask what you did differently
- 12 manicotti shells: Do not bother with the no boil ones, they never cook properly in my experience
- 1 cup shredded mozzarella cheese: For that golden bubbly top everyone fights over
- ½ cup grated Parmesan cheese: Extra because more is always better
- Fresh basil or parsley: Makes it look like you put in way more effort than you actually did
Instructions
- Preheat your oven:
- 375°F (190°C) is the sweet spot for getting everything cooked through without drying out the edges. Grease your 9×13 inch dish with a little olive oil or cooking spray.
- Start the sauce base:
- Heat that tablespoon of olive oil in a large skillet over medium heat. Toss in your chopped onion and let it cook for 3 to 4 minutes until it goes translucent and smells amazing. Add the minced garlic for just one minute, do not let it brown or it will turn bitter.
- Brown the beef:
- Add the ground beef and break it up with your spoon as it cooks. Keep going until it is completely browned, then drain off the excess fat. Nobody needs that much grease in their final dish.
- Build the sauce:
- Pour in both cans of tomatoes and the tomato paste. Sprinkle in basil, oregano, red pepper flakes if you are using them, sugar, and salt and pepper. Let it simmer uncovered for 15 to 20 minutes, stirring every so often. The sauce should thicken up nicely.
- Cook the pasta:
- Boil those manicotti shells for 1 to 2 minutes less than the package says. Drain them gently and rinse with cold water so they stop cooking. Burnt fingers are part of the process, but try not to break them.
- Mix the cheese filling:
- Combine ricotta, mozzarella, Parmesan, egg, parsley, nutmeg, salt and pepper in a bowl. Mix it until it is smooth and everything is evenly distributed. Taste it and adjust the seasoning if you need to.
- Stuff the shells:
- Use a piping bag or a zip top bag with the corner cut off to fill each manicotti. A spoon works too but it is messier. Do not overstuff or they will split open in the oven.
- Start the assembly:
- Spread about one cup of that meat sauce over the bottom of your prepared baking dish. Arrange the filled manicotti in a single layer on top of the sauce.
- Add the layers:
- Spoon the remaining sauce evenly over all the pasta. Sprinkle the rest of the mozzarella and Parmesan on top. This is the part that makes everyone hovering in the kitchen start asking if it is ready yet.
- Bake covered:
- Cover the dish with foil and bake for 25 minutes. The foil keeps everything moist while the pasta finishes cooking.
- Get it golden:
- Remove the foil and bake for another 10 to 15 minutes. You want the cheese bubbly and starting to turn golden brown in spots.
- The hardest part:
- Let it rest for 10 minutes before serving. This gives the cheese time to set so it does not all run out when you cut it. I know, waiting is the worst.
 Pin It
 My father in law took one bite of this and told me it tasted exactly like the manicotti from the Italian restaurant he went to as a kid in the 1970s. I am not sure if that was a compliment or just him being nostalgic, but he went back for seconds and that is usually the only review that matters. Now he requests it every time they visit, and I have learned to double the recipe.
Make It Ahead
You can assemble the entire thing up to 24 hours before baking, just cover it tightly and keep it in the refrigerator. The flavors actually get better when they have time to hang out together. Add about 5 to 10 minutes to the baking time if it is going into the oven cold from the fridge.
Freezing Instructions
This freezes beautifully either before or after baking. Wrap it really well with plastic and foil, and it will keep for about 3 months. Thaw overnight in the refrigerator before baking, or add about 20 minutes to the covered baking time if you are baking from frozen. Just make sure it is completely heated through.
Serving Suggestions
A simple green salad with a bright vinaigrette cuts through all that rich cheese and sauce. Garlic bread is non negotiable in my house, mostly because my husband would protest otherwise. And a glass of medium bodied red wine turns dinner into something that feels like an occasion.
- Let people add extra red pepper flakes at the table if they want more heat
- Set out extra Parmesan because there is no such thing as too much
- This needs to be served family style, right from the baking dish
 Pin It
 There is something deeply satisfying about pulling a bubbling pan of manicotti out of the oven and watching everyone rush to the table. This is the kind of food that makes people feel taken care of, and maybe that is the whole point of cooking anything at all.
Recipe FAQs
- → Can I prepare this dish ahead of time?
-
Yes, assemble the entire dish up to 24 hours in advance and refrigerate. Add 10-15 minutes to the baking time if baking straight from the refrigerator.
- → What can I use instead of ground beef?
-
Ground turkey, Italian sausage, or a plant-based meat alternative work well. For vegetarian options, add sautéed mushrooms or spinach to the sauce.
- → Why is nutmeg added to the cheese filling?
-
A small amount of nutmeg enhances the creamy ricotta filling, adding subtle warmth and depth that complements the rich cheeses without overpowering.
- → How do I prevent manicotti from tearing when filling?
-
Use a piping bag or zip-top bag with the corner snipped to gently fill the shells. Cooking pasta slightly less than package directions also helps maintain structure.
- → Can I freeze this dish?
-
Assemble in a freezer-safe dish, wrap tightly, and freeze for up to 3 months. Thaw overnight in the refrigerator before baking as directed.
- → What sides pair well with this dish?
-
A crisp Italian salad with vinaigrette and warm garlic bread complement the rich, cheesy flavors. Serve with a medium-bodied red wine like Chianti or Merlot.
