 Pin It
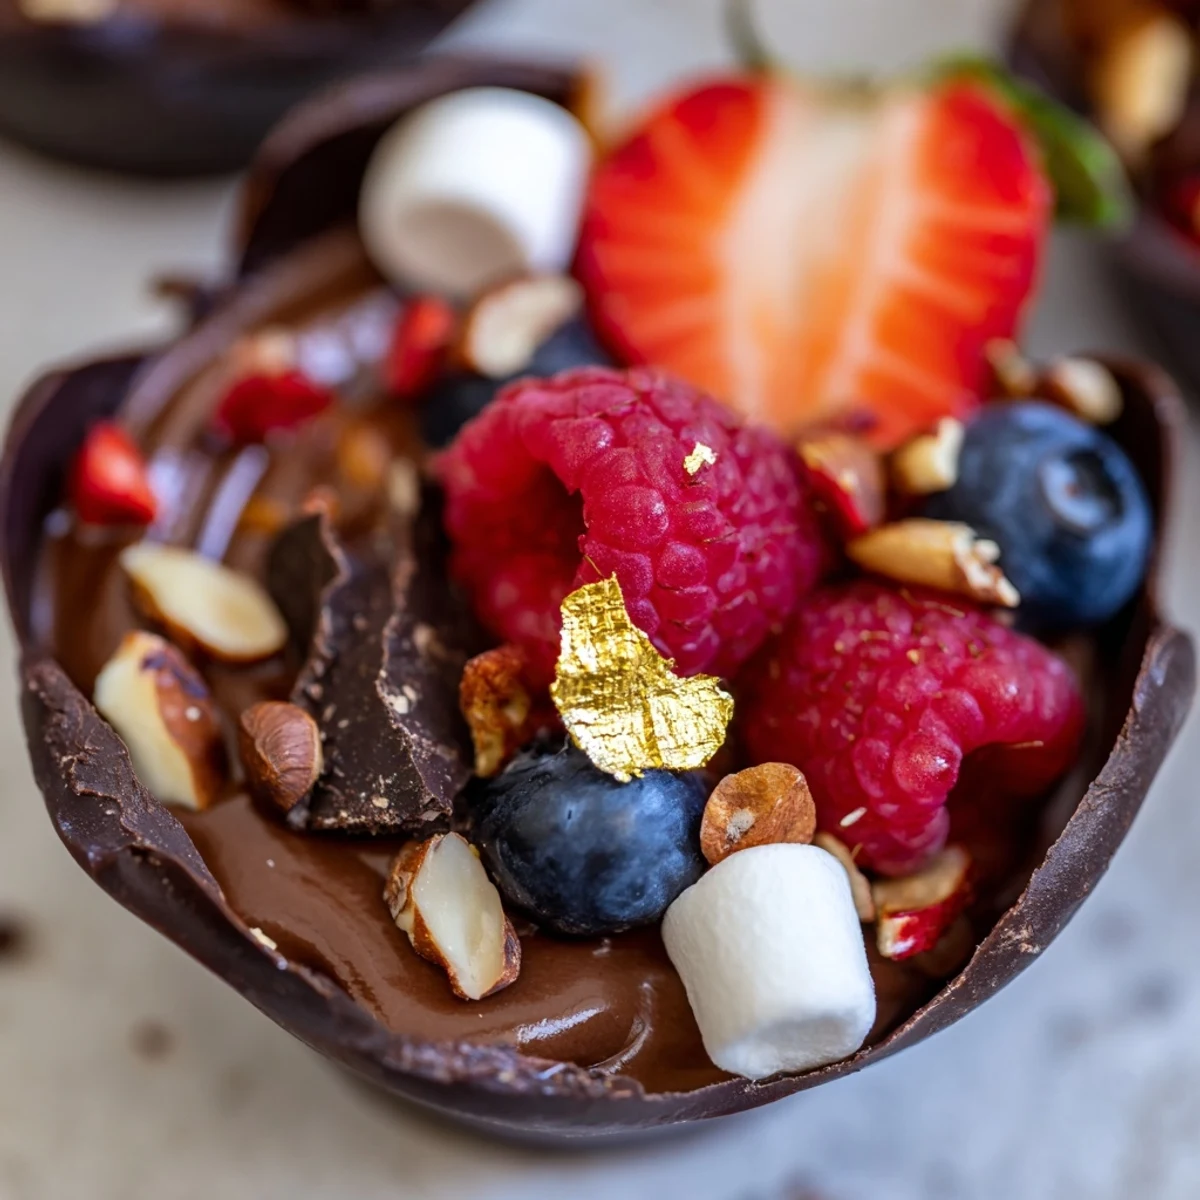
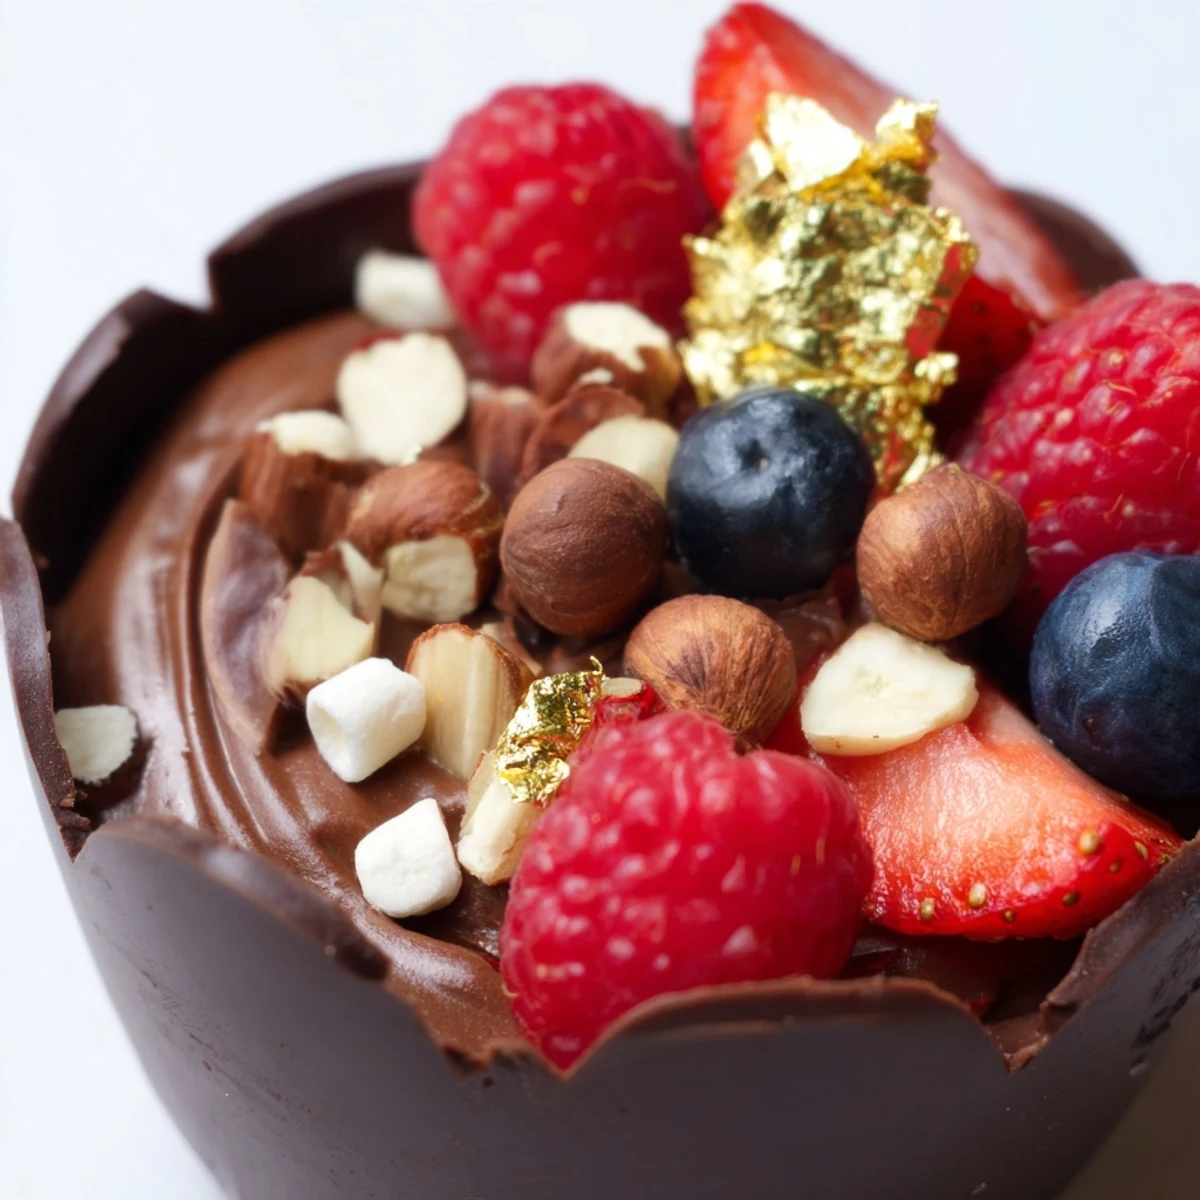
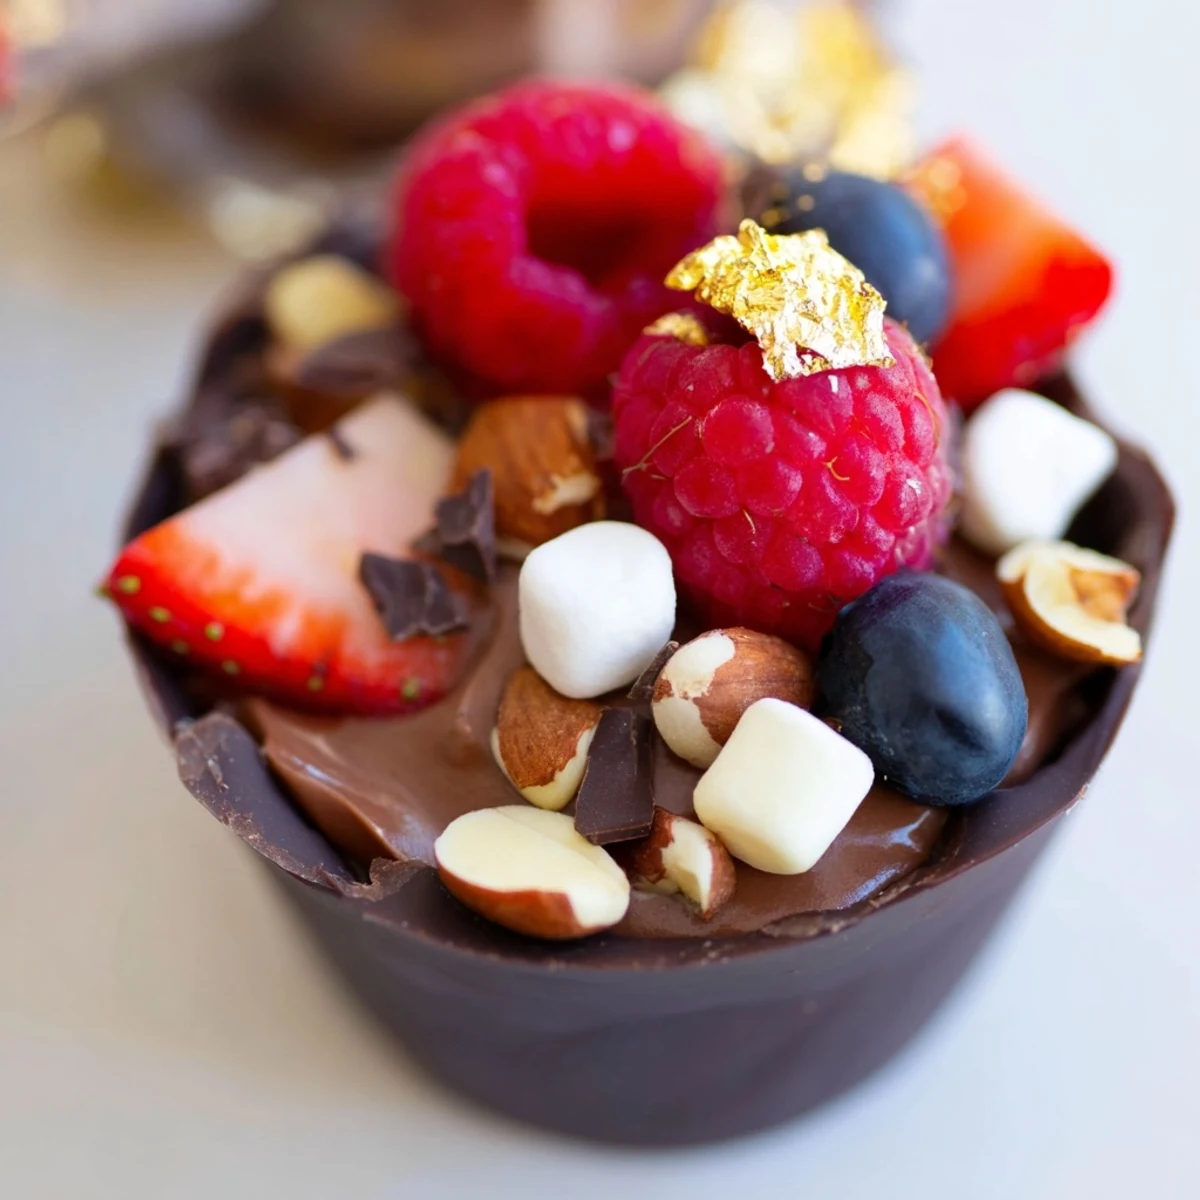
 Create stunning chocolate grazing cups that combine silky dark chocolate mousse with vibrant fresh berries and crunchy toppings. These individual desserts feature handmade chocolate cups filled with whipped chocolate cream, then crowned with raspberries, strawberries, blueberries, toasted nuts, mini marshmallows, and chocolate curls.
The contrast between the crisp chocolate shell and velvety mousse creates an irresistible texture, while colorful toppings make each cup visually striking. Perfect for dinner parties, celebrations, or whenever you crave something extraordinary.
Last Valentine's Day, I decided to skip the restaurant reservation and create something intimate at home instead. These chocolate grazing cups became the centerpiece of our dessert table, and watching guests customize their own toppings felt surprisingly interactive and personal. Now they're my go-to whenever I want to serve something that looks impressive but actually comes together with zero stress.
I made these for my sister's bridal shower last spring, and what started as a dessert station became the most photographed corner of the room. The bride spent ten minutes arranging her cup exactly how she wanted it, berries tucked into corners, gold leaf catching the afternoon light. Sometimes the prettiest desserts are also the most freeing.
Ingredients
- Dark chocolate: Higher cocoa percentage means your cups will hold their shape better and taste less sugary sweet
- Heavy cream: Cold straight from the fridge whips up faster and holds those air pockets longer
- Fresh berries: Let them come to room temperature while you work so their juices release when someone takes a bite
- Chopped nuts: Toast them lightly in a dry pan for three minutes to wake up their natural oils
Instructions
- Craft your chocolate cups:
- Melt the chocolate until it pours like warm honey, then brush the inside of each liner with two thin coats instead of one thick layer
- Whip the mousse base:
- Fold the melted chocolate into your whipped cream using a figure-eight motion until no white streaks remain
- Build each cup:
- Pipe the mousse in gentle swirls, leaving the top third open for your guests to crown with their chosen treasures
- Set before serving:
- Twenty minutes in the refrigerator firms everything up beautifully without making the chocolate too hard to bite through
 Pin It
 My neighbor now requests these for every gathering, and I've learned to keep extra liners on hand because people always ask for the recipe. There's something magical about watching someone carefully select their toppings like they're composing a tiny edible masterpiece.
Making Them Your Own
White chocolate cups change the entire vibe, creating a blank canvas that makes colorful berries pop against the pale vessel. Sometimes I'll swirl melted milk and dark chocolate together before brushing the liners for a marbled effect that looks restaurant-quality but takes thirty seconds extra.
Timing The Assembly
The chocolate cups can sit at room temperature for hours without losing their shape, but fill them with mousse no more than two hours before serving. I learned this the hard way when a batch sat out too long and the rich filling started weeping through the chocolate walls.
Setting Up Your Topping Station
Arrange all your garnishes in small shallow bowls with their own tiny spoons, creating a topping bar that invites people to play with their food and try combinations they might not have considered. Set out some unexpected options like crushed pretzels for salt contrast or candied ginger for a spicy kick that cuts through the rich chocolate
- Keep spoons or tweezers nearby so guests can place delicate ingredients like gold leaf precisely
- Offer a small card suggesting winning combinations like berries and nuts or marshmallows and chocolate curls
- Have extra cups ready in case someone wants to try multiple flavor profiles
 Pin It
 These cups taught me that the most elegant desserts are often the ones that invite participation and personal choice. Watching someone customize their perfect bite feels more special than serving something pre-assembled and uniform.
Recipe FAQs
- → How far in advance can I make these chocolate cups?
-
Prepare the chocolate cups and mousse up to 24 hours ahead. Keep cups chilled separately, then assemble with fresh toppings 2-4 hours before serving for optimal texture and presentation.
- → Can I use different types of chocolate?
-
Absolutely. Dark chocolate provides intense flavor, but milk or white chocolate work beautifully for cups or mousse. Consider combining varieties for layered taste and visual appeal.
- → What other toppings work well?
-
Fresh fruit like mango, kiwi, or pomegranate seeds add color and brightness. Crushed cookies, toasted coconut, caramel drizzle, or shaved white chocolate create delicious variations and textures.
- → How do I prevent the chocolate cups from cracking?
-
Ensure your chocolate is properly tempered and apply thick, even layers to the liners. Chill thoroughly before carefully removing. Work in a cool room to prevent melting during handling.
- → Can these be made without special equipment?
-
Yes. Use paper cupcake liners instead of silicone, melt chocolate in the microwave, and whip cream by hand. A zip-top bag with corner snipped works perfectly for piping mousse into cups.
- → How should I store leftovers?
-
Keep assembled cups refrigerated in an airtight container for up to 2 days. Note that fresh berries may soften over time, so add them just before serving if preparing ahead.
