 Pin It
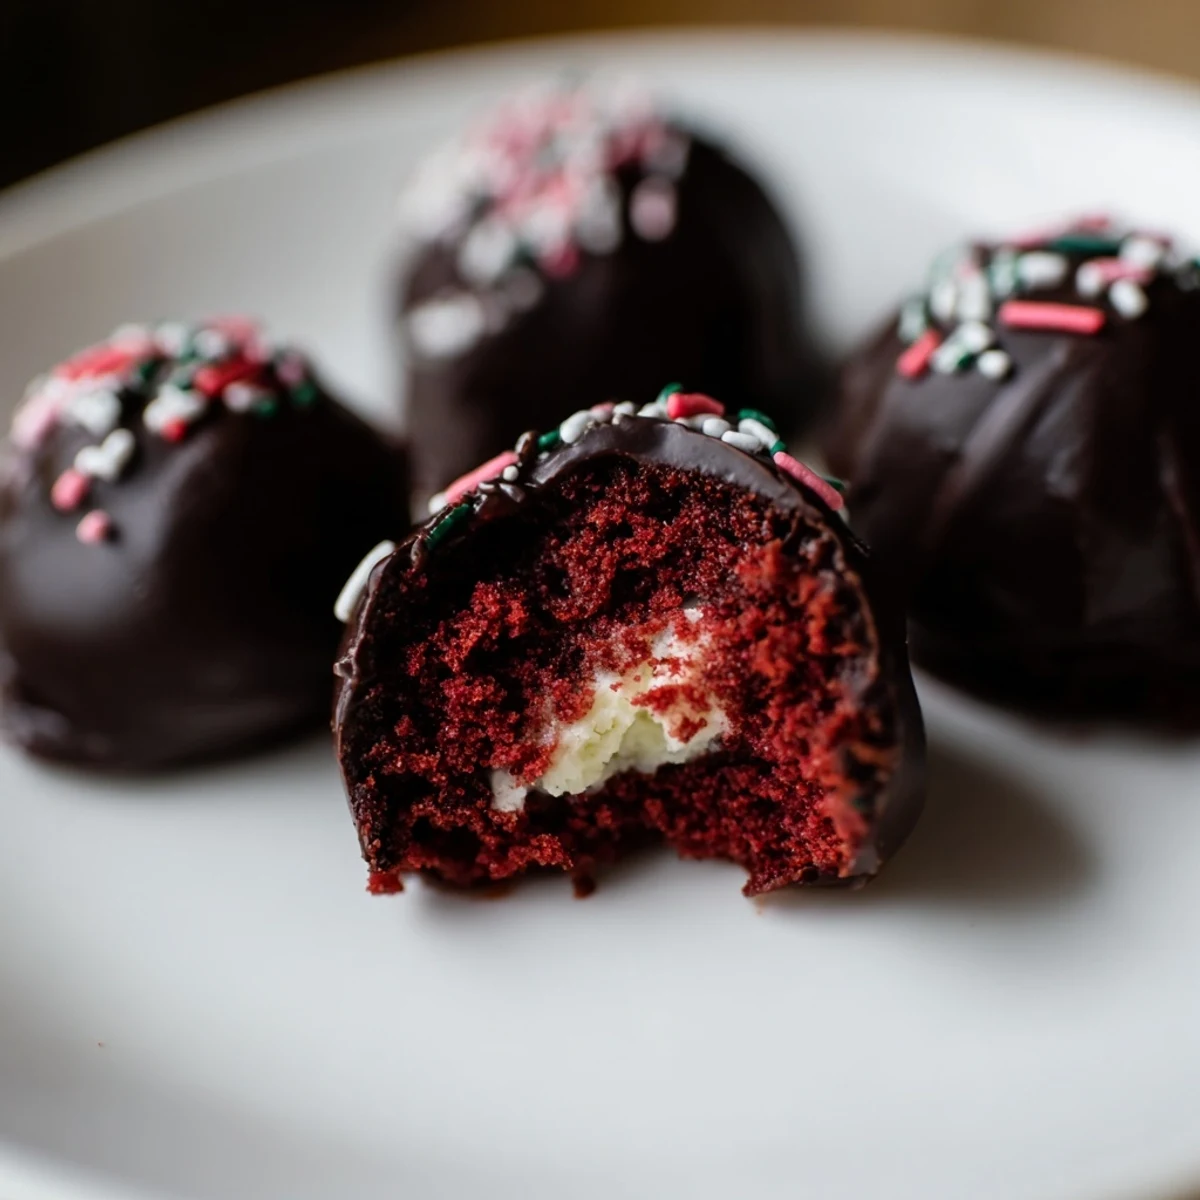
 These elegant two-bite desserts bring together the classic flavors of red velvet cake and creamy cheesecake. The moist, vibrant red velvet cake is crumbled and mixed with a smooth cheesecake filling, then rolled into perfect bite-sized spheres.
Each ball is dipped in melted chocolate—choose between white or dark for contrast—creating a crisp, luscious shell that complements the tender interior. The finishing touch of sprinkles adds festive flair, making them ideal for holiday platters, birthday celebrations, or dinner party finales.
With 24 servings from one batch and straightforward preparation, these impressive treats are easier to make than they appear. The chilling step ensures clean, professional-looking results every time.
The batter turned a shade of red so vivid it looked unreal, and my daughter stood on a step stool beside me gasping like I had performed a magic trick. That splash of food coloring transforms a humble cocoa cake into something theatrical and impossible to ignore. These little cheesecake stuffed balls born from that same batter became the most requested party contribution in my house within months of that first batch.
I brought a tray of these to a potluck last winter and watched three people hover near the dessert table pretending to chat while secretly reaching for seconds. One friend cornered me by the coat rack demanding the recipe before I even got my jacket off. Moments like that are why I keep a batch stashed in the freezer at all times during holiday season.
Ingredients
- All purpose flour (1 1/4 cups, 160 g): Provides the structure for a tender crumb that breaks apart nicely when you crumble it for the balls.
- Granulated sugar (3/4 cup, 150 g): Sweetens the cake without making it overly sweet since the coating adds richness on top.
- Unsweetened cocoa powder (2 tbsp, 16 g): Just enough to give that subtle chocolate backbone underneath the red velvet flavor.
- Baking soda (1/2 tsp): Gives the cake a gentle lift without overdoing the rise.
- Salt (1/4 tsp): Balances the sweetness and enhances the cocoa notes.
- Buttermilk (1/2 cup, 120 ml, room temperature): The secret to that signature velvety texture and a slight tang that pairs beautifully with the cheesecake center.
- Unsalted butter (1/2 cup, 110 g, softened): Adds richness and moisture to the cake crumb.
- Large eggs (2, room temperature): Bind everything together and contribute to a soft, plush texture.
- Vanilla extract (1 tsp for cake, 1/2 tsp for filling): Rounds out the flavor in both the cake and the cheesecake layer.
- Red food coloring (1 tbsp): Delivers that iconic crimson that makes these feel festive and special.
- Cream cheese (8 oz, 225 g, softened): Forms the creamy, tangy heart of every ball so use full fat for the best results.
- Powdered sugar (1/4 cup, 30 g): Sweetens the filling without adding graininess.
- White or dark chocolate (10 oz, 285 g): Creates that satisfying snap when you bite through the shell so use good quality melting wafers if you can find them.
- Red or white sprinkles (optional): A finishing touch that makes these feel like tiny gifts.
Instructions
- Bake the red velvet cake:
- Preheat your oven to 350 degrees F and line an 8 by 8 inch pan with parchment. Whisk the flour, sugar, cocoa, baking soda, and salt in one bowl, then blend the buttermilk, butter, eggs, vanilla, and red coloring in another. Fold them together until just smooth, pour into the pan, and bake 18 to 20 minutes until a toothpick pulls out clean. Let it cool completely, which takes patience but is absolutely essential.
- Whip up the cheesecake filling:
- Beat the softened cream cheese with powdered sugar and vanilla until silky and lump free. If it feels too soft to hold shape, pop it in the fridge for about 15 minutes until it firms up slightly.
- Build the balls:
- Crumble the cooled cake into a large bowl with your fingers, add the cheesecake mixture, and work them together until a cohesive dough forms. Roll into one inch balls and set them on a parchment lined sheet. Freeze for a full hour so they hold their shape during dipping.
- Dip and finish:
- Melt the chocolate in 20 second bursts, stirring between each round until perfectly smooth. Dip each frozen ball using a fork, tap off the excess, and set on fresh parchment. Add sprinkles immediately before the shell sets, then let them harden at room temperature or in the fridge.
 Pin It
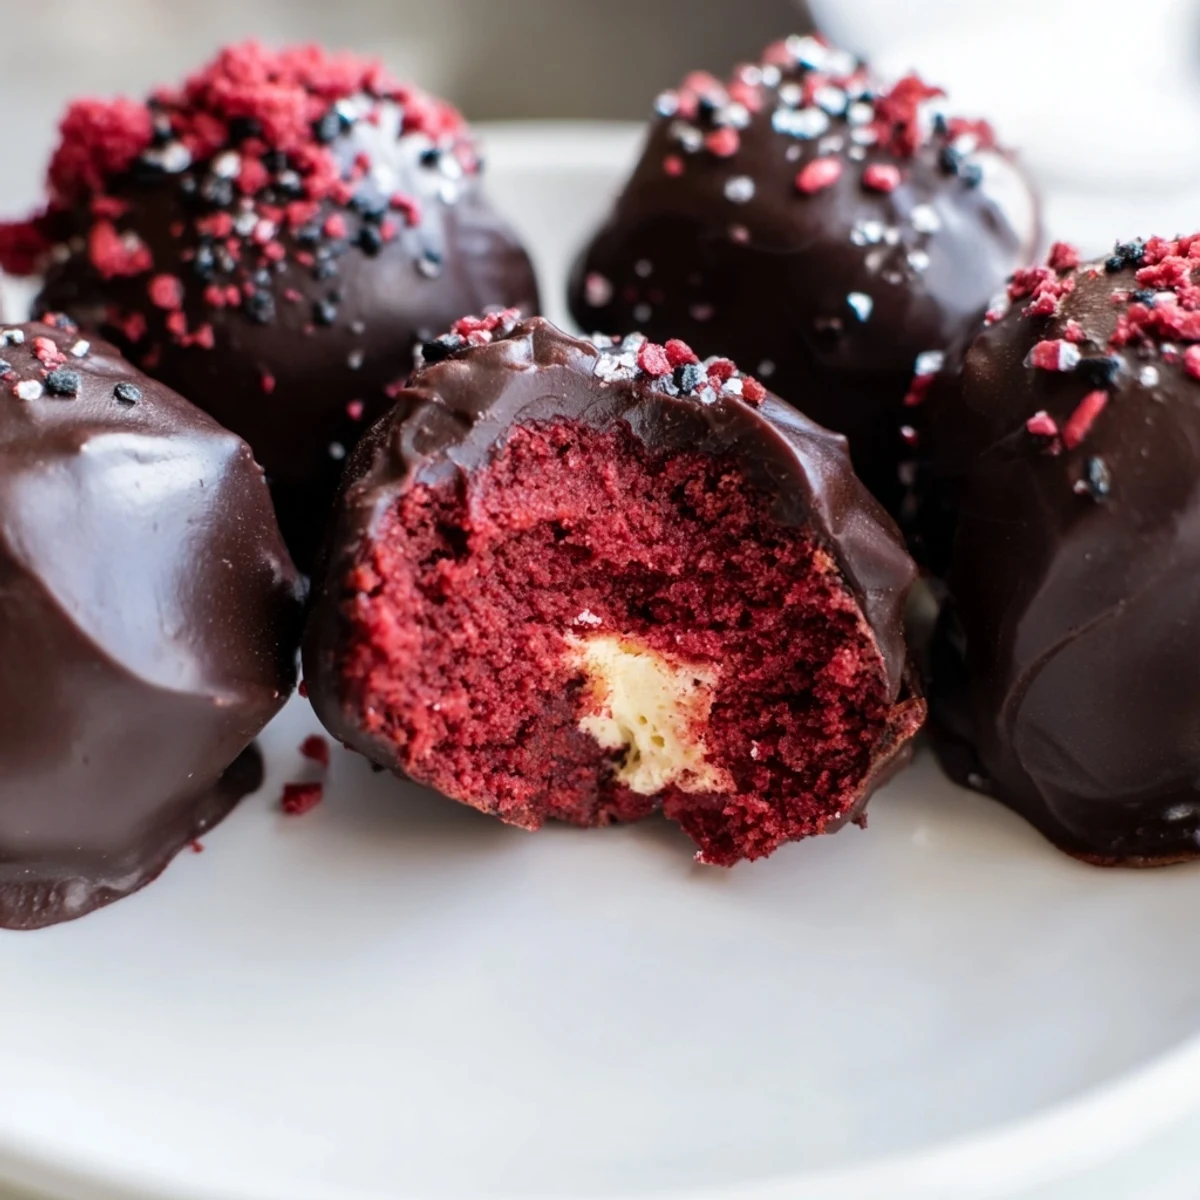
 There is something deeply satisfying about arranging a full tray of these glossy little spheres, each one uniform and gleaming, knowing the creamy surprise waiting inside each bite.
Choosing Your Chocolate Coating
White chocolate gives a striking contrast against the red interior and looks stunning in photographs. Dark chocolate adds a bittersweet edge that balances the sweetness of the cake and filling beautifully. I have also tried ruby chocolate on a whim and the subtle berry undertone was a revelation I now rotate in every holiday batch.
Storage That Actually Works
Keep them in an airtight container in the refrigerator for up to one week, though mine never last that long. For longer storage, freeze them in a single layer before transferring to a bag and they hold up beautifully for a full month. Let frozen balls thaw in the fridge overnight rather than on the counter to prevent the chocolate shell from sweating.
Fun Variations to Try
Once you master the basic version the possibilities open up in every direction. A splash of Chambord or Baileys in the cheesecake mixture turns these into a decidedly adult treat worth bringing to a dinner party. You can also roll the edges in crushed graham crackers or mini chocolate chips instead of sprinkles for added texture.
- Try adding a teaspoon of espresso powder to the cake batter for a mocha red velvet twist.
- Roll a single frozen raspberry inside each ball for a fruity surprise at the center.
- Always taste the cheesecake filling before shaping to make sure the sweetness level suits you.
 Pin It
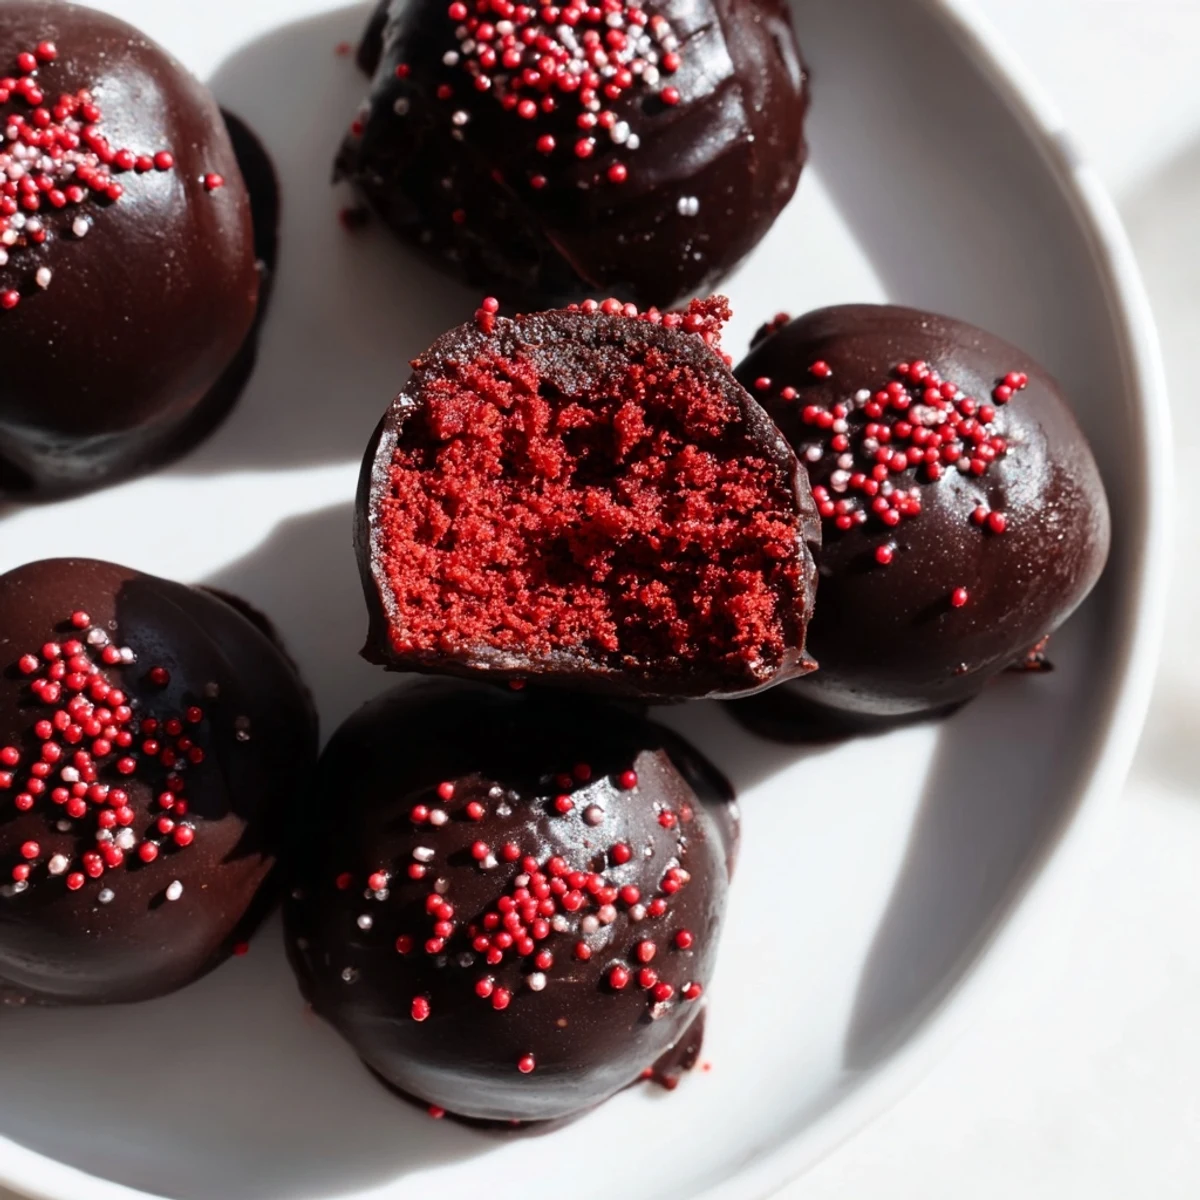
 Every time I pull one of these from the fridge and break through that crisp shell into the soft center, I remember why some recipes become permanent fixtures. They are small, festive, and unreasonably lovable.
Recipe FAQs
- → Can I use store-bought red velvet cake instead of making it from scratch?
-
Yes, you can use a store-bought red velvet cake or cake mix to save time. Simply crumble the prepared cake and combine it with the cheesecake mixture as directed in step 3. This shortcut works beautifully and still yields delicious results.
- → How long do these cheesecake balls stay fresh?
-
Store the finished balls in an airtight container in the refrigerator for up to 1 week. For longer storage, freeze them for up to 1 month. Place parchment paper between layers to prevent sticking. They're best served chilled but can sit at room temperature for up to 2 hours during parties.
- → What's the best chocolate for coating?
-
Both white and dark chocolate work beautifully. White chocolate provides stunning contrast against the red velvet, while dark chocolate offers a sophisticated, bittersweet balance. Use chocolate melting wafers for the smoothest coating, or chop high-quality chocolate bars into even pieces for even melting.
- → Why do the balls need to freeze before dipping?
-
Freezing firms up the mixture, making it much easier to handle during the dipping process. Cold balls are less likely to fall apart or get misshapen when coated with warm chocolate. This step also helps the chocolate set more quickly, giving you a smoother, more professional finish.
- → Can I add alcohol to the cheesecake mixture?
-
Absolutely! A splash of Bailey's Irish Cream, Chambord, or vanilla liqueur adds sophisticated flavor. Start with 1-2 tablespoons and adjust to taste. The alcohol pairs wonderfully with both the cream cheese and chocolate coating, making these treats perfect for adult gatherings.
- → What if my chocolate coating is too thick?
-
If the melted chocolate is too thick for smooth dipping, add 1 teaspoon of coconut oil or vegetable shortening per cup of chocolate. Stir gently until combined and smooth. This thins the coating without affecting the flavor or texture once it sets.
