 Pin It
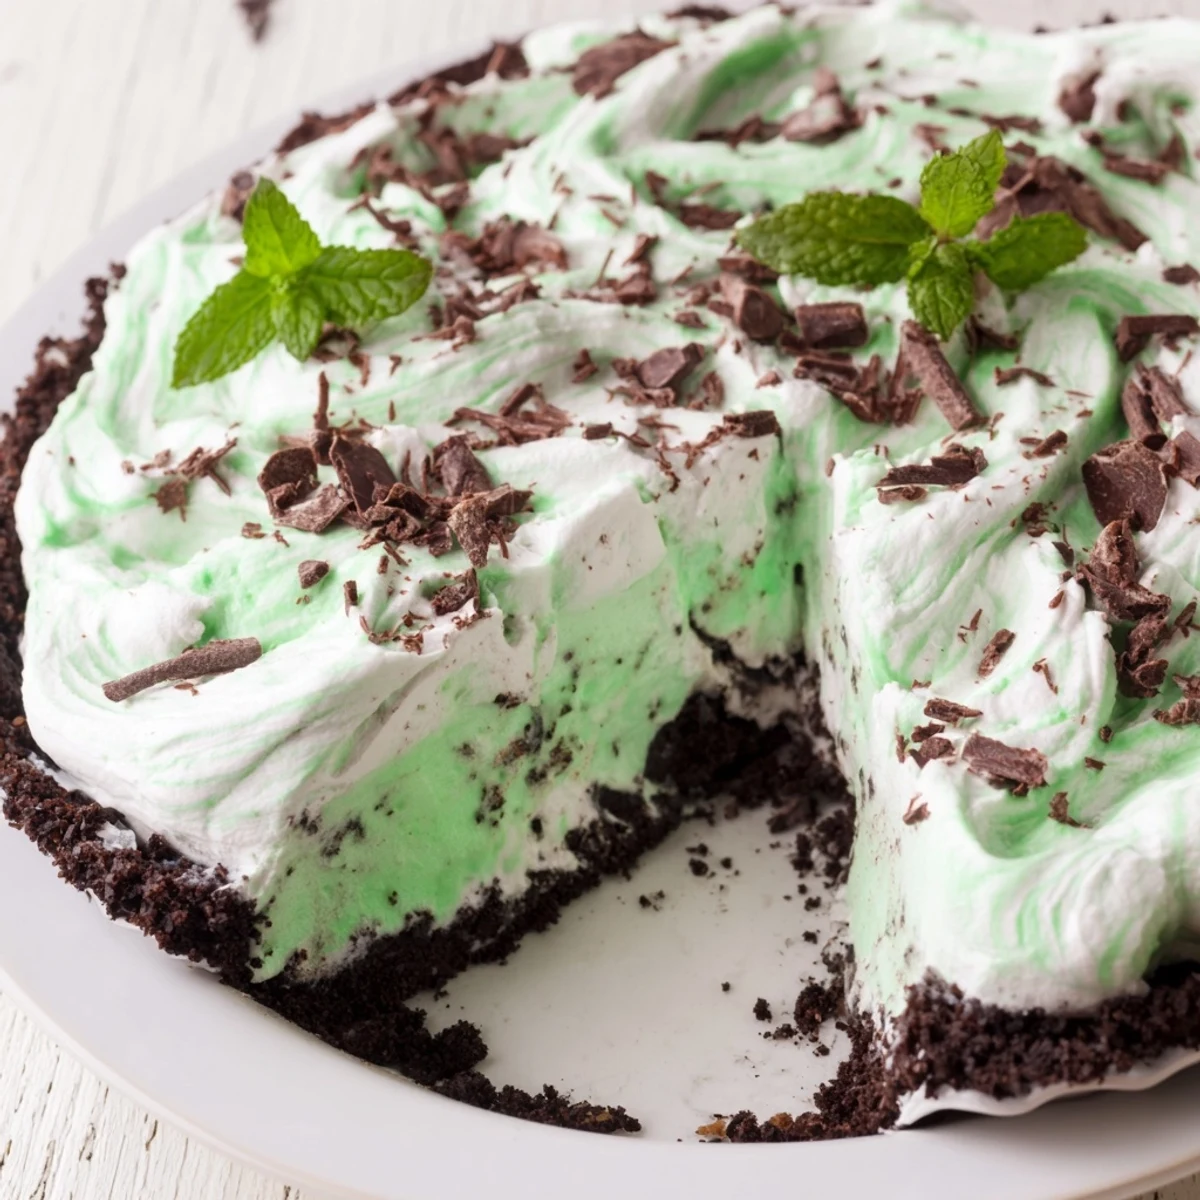
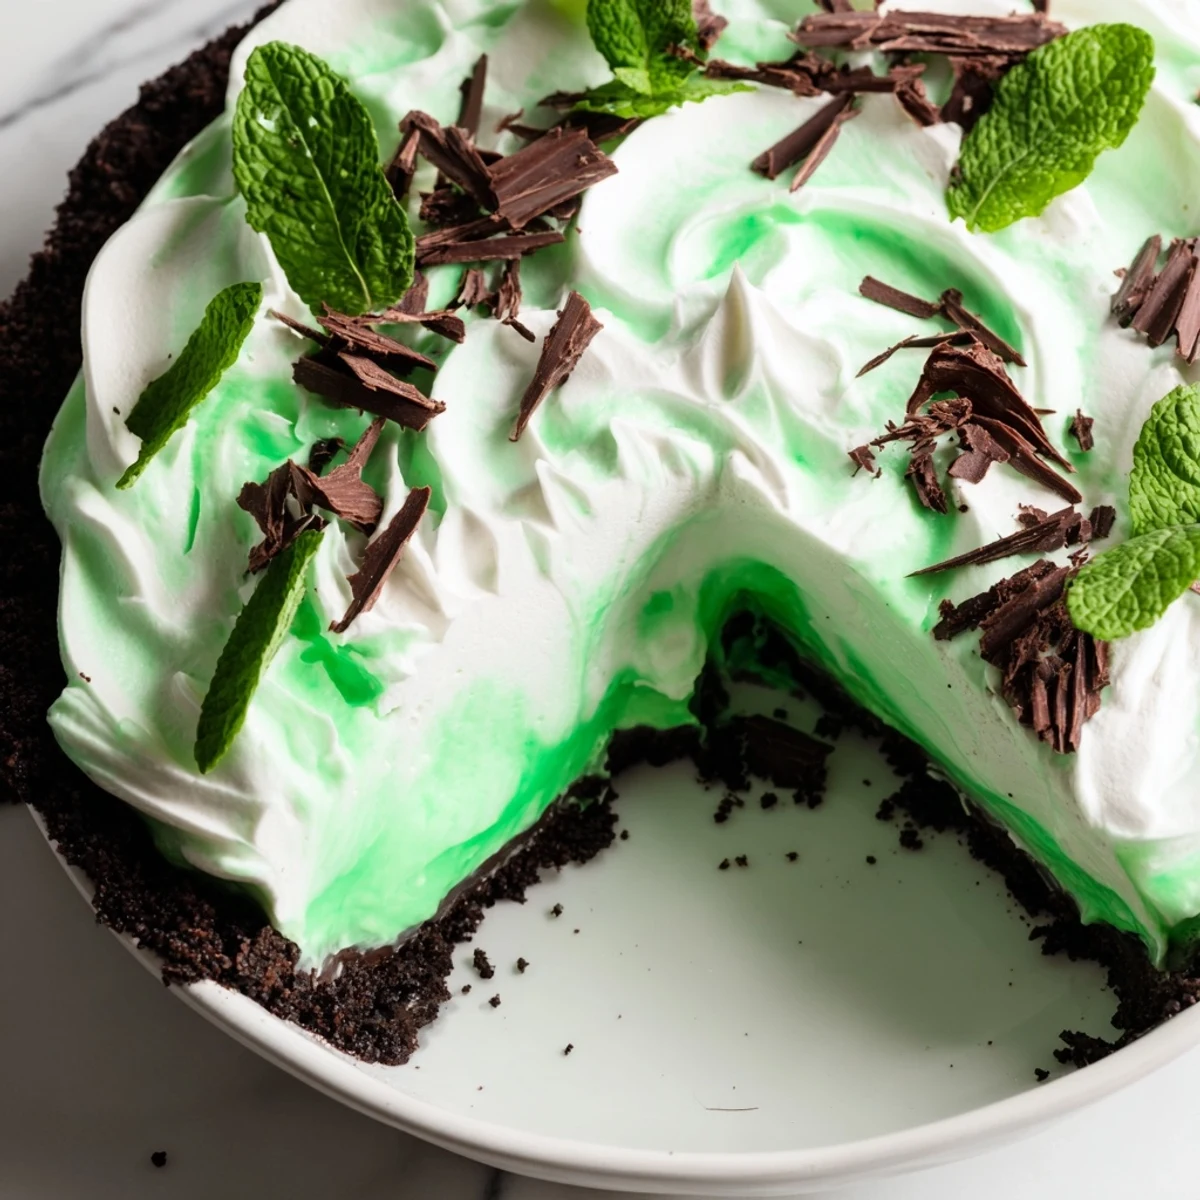
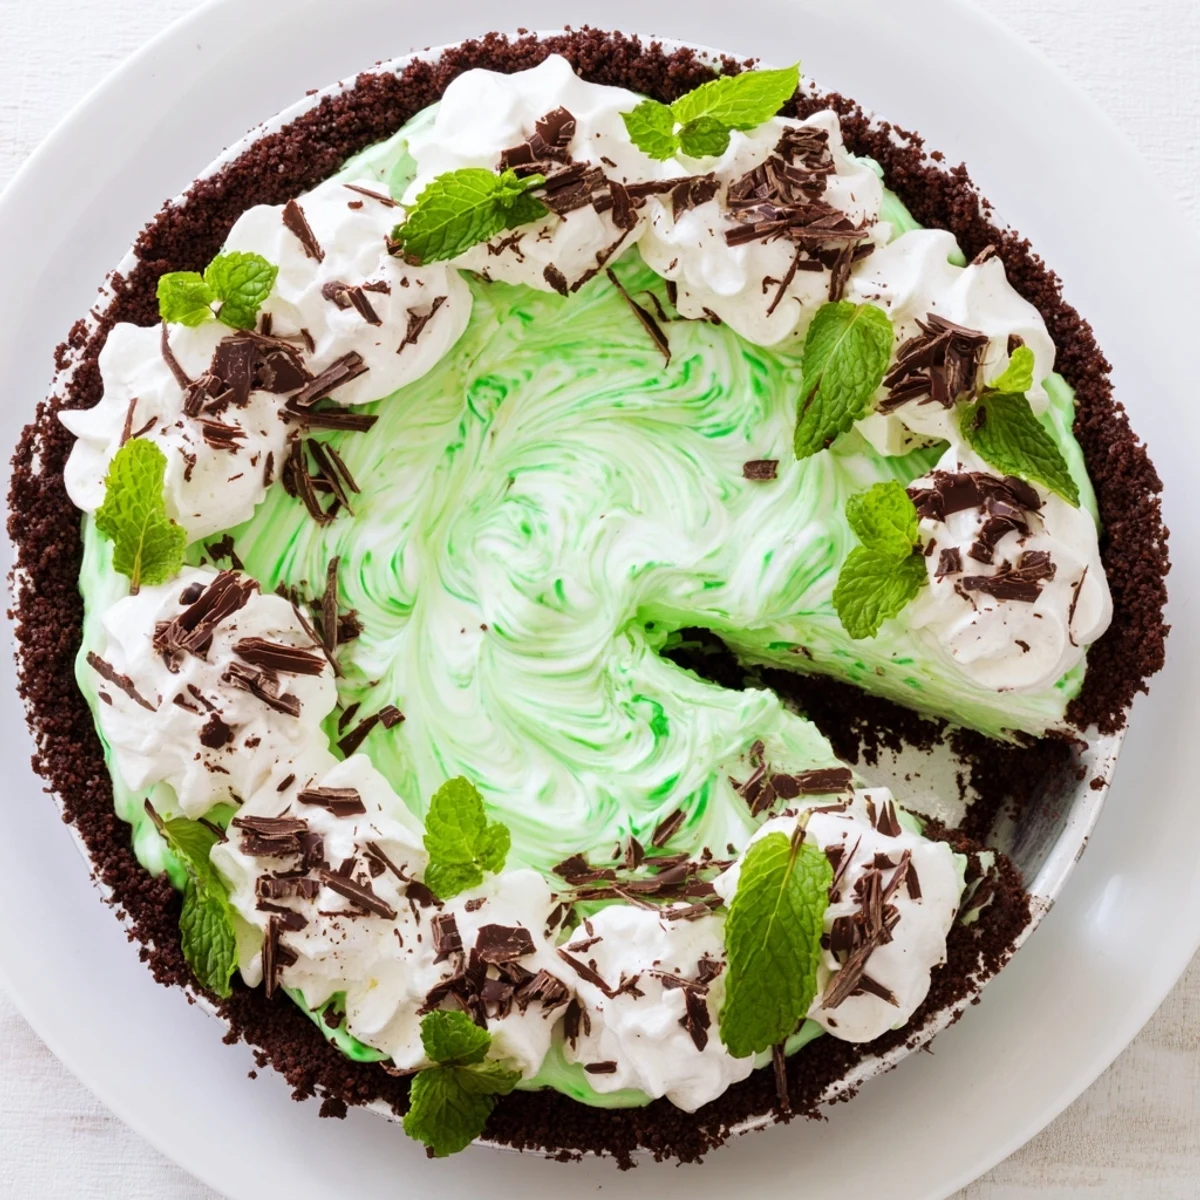
 This vibrant dessert combines a chocolate cookie base with smooth mint-infused vanilla pudding and freshly whipped cream. The striking green swirl pattern makes it an eye-catching centerpiece for spring gatherings. Simple to prepare with just 20 minutes of active time, the chilling step allows flavors to meld beautifully. Rich chocolate crumbs balance the light, refreshing mint filling, while the whipped cream topping adds airy sweetness.
The moment I swirled that first batch of green peppermint cream into the chocolate crust, my kitchen filled with the most incredible mint chocolate aroma. I'd been experimenting with St. Patrick's Day desserts for years, but something about this particular combination felt like finding a four-leaf clover in your own backyard. My roommate walked in, took one look at the marbled pattern, and asked if I'd secretly attended pastry school. That's when I knew this pie was something special.
Last year I brought this to a friend's March birthday dinner, entirely forgetting it coincided with St. Patrick's Day until someone pointed out the timing. But honestly, this pie has become a year-round favorite in my house. The way the peppermint hits you first, followed by that deep chocolate cookie base, works on hot summer afternoons just as well as rainy winter evenings.
Ingredients
- Chocolate cookie crumbs: Dark chocolate cookies create that slightly bitter note that keeps the sweet filling from becoming cloying, and they press into a crust that holds together beautifully
- Unsalted butter: Melted butter binds the crumbs without adding saltiness that would compete with the peppermint
- Instant vanilla pudding mix: This creates the perfect base structure for the filling, allowing the peppermint to shine while providing body
- Cold whole milk: Cold milk is crucial for proper pudding setting, and whole milk gives the filling that luxurious mouthfeel
- Peppermint extract: This is the star of the show, and I've learned to start with less than you think, since the flavor intensifies as it chills
- Green food coloring: Gel coloring works best here, adding vibrant color without thinning the mixture
- Heavy whipping cream: Whipped to stiff peaks, this transforms the dense pudding into something airy and mousse-like
- Powdered sugar: Just enough to sweeten the cream without making it grainy
- Vanilla extract: A background note that rounds out the sharpness of the peppermint
- Chocolate shavings or mini chocolate chips: These aren't just garnish, they provide little bursts of intense chocolate that cut through the cream
- Fresh mint leaves: A pop of freshness that tells everyone exactly what flavors they're about to experience
Instructions
- Prepare the chocolate foundation:
- Preheat your oven to 350°F and press the chocolate cookie crumbs mixed with melted butter firmly into your pie dish, making sure to get up the sides for that classic crusted edge
- Bake to crispy perfection:
- Bake for 8 to 10 minutes until you can smell toasted chocolate, then let it cool completely while you make the filling
- Create the minty base:
- Whisk the vanilla pudding mix with cold milk and peppermint extract until it thickens into something smooth and luscious
- Add the magic color:
- Drop in food coloring one drop at a time, folding gently until you reach a shade that makes you smile, remembering that lighter shades often taste more delicate
- Whip the clouds:
- In a separate bowl, beat the heavy cream with powdered sugar and vanilla until stiff peaks form, those beautiful peaks that hold their shape when you lift the beaters
- Lighten the filling:
- Fold half the whipped cream into the green pudding, using gentle strokes to keep all that air you just whipped in
- Build the layers:
- Spread the mint filling into your cooled crust, creating an even layer that begs to be topped
- Make the swirl:
- Dollop the remaining whipped cream on top and use a spatula to swirl it through the green filling, creating those gorgeous marble patterns that make this pie so stunning
- Practice patience:
- Refrigerate for at least 2 hours, though overnight is even better for the flavors to really meld and the texture to set completely
- Finish with flair:
- Add chocolate shavings and fresh mint leaves right before serving, because that contrast of dark chocolate against bright green is what makes this pie unforgettable
 Pin It
 My grandmother always said the prettiest desserts taste the best, and I think there's something to that. When I serve this pie and watch people's faces light up at that first glimpse of green and white swirling together, the meal already feels like a celebration before anyone takes a bite.
Making It Your Own
Once I made this with a graham cracker crust when I was out of chocolate cookies, and while the flavor profile changed completely, it became a lighter, brighter version that my kids actually preferred. The beauty of this recipe is how adaptable it is to whatever you have in your pantry.
Serving Suggestions
A slice of this pie alongside a cup of strong Irish coffee creates one of those dessert combinations that feels like it was invented in heaven. The bitterness of the coffee cuts through the sweet creaminess, while the peppermint lingers beautifully on your palate.
Storage and Make-Ahead Tips
This pie actually improves after a day in the refrigerator, as the flavors meld together and the crust softens slightly. It's the perfect make-ahead dessert for dinner parties.
- Wrap the pie dish tightly with plastic wrap after it's fully set to prevent the surface from absorbing any fridge flavors
- The crust can be made up to two days ahead and stored at room temperature in an airtight container
- Add fresh garnish right before serving, as mint leaves wilt quickly in the refrigerator
 Pin It
 There's something deeply satisfying about serving a dessert that looks like you spent hours on it, when really it came together in one afternoon with simple techniques and ingredients. That's the kind of kitchen magic worth sharing.
Recipe FAQs
- → How far ahead can I make this?
-
You can prepare this up to 24 hours in advance. The pie actually improves after chilling longer, allowing flavors to develop fully. Keep refrigerated until ready to serve.
- → Can I use homemade pudding instead of instant?
-
Yes, homemade vanilla pudding works beautifully. Allow it to cool completely before incorporating the whipped cream to maintain proper texture.
- → What's the best way to create the swirl effect?
-
Drop dollops of plain whipped cream onto the green filling, then gently marble with a spatula using light figure-eight motions. Don't overmix to maintain distinct swirls.
- → How long will leftovers stay fresh?
-
Covered properly in the refrigerator, this stays fresh for 3-4 days. The crust may soften slightly after the first day but remains delicious.
- → Can I freeze this pie?
-
Freezing isn't recommended as the texture becomes grainy when thawed. Best enjoyed fresh within the first few days for optimal creaminess.
