 Pin It
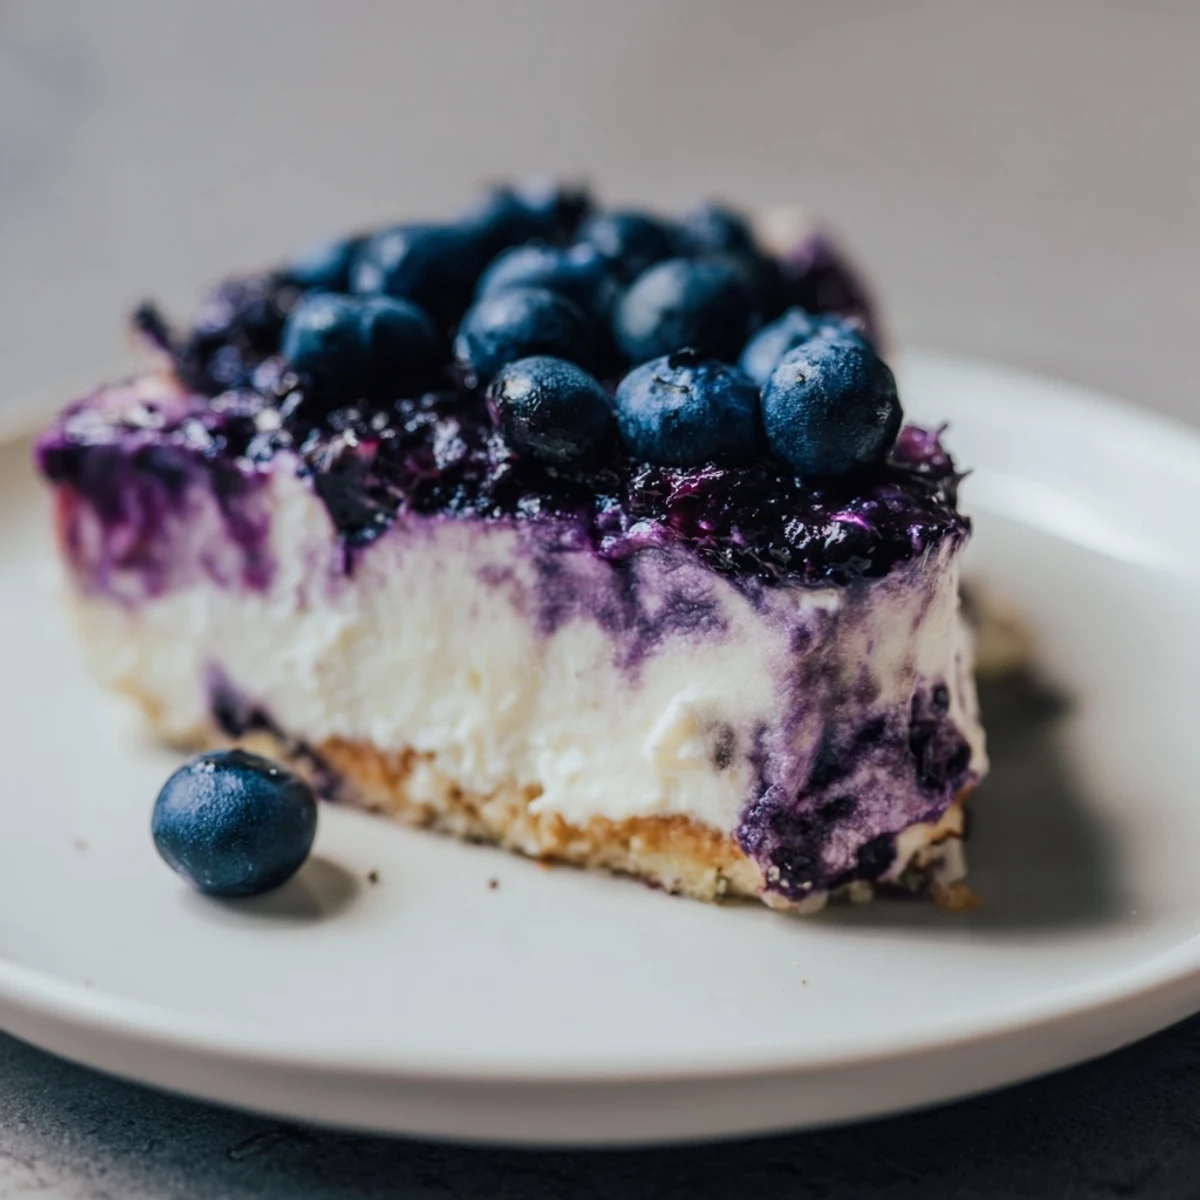
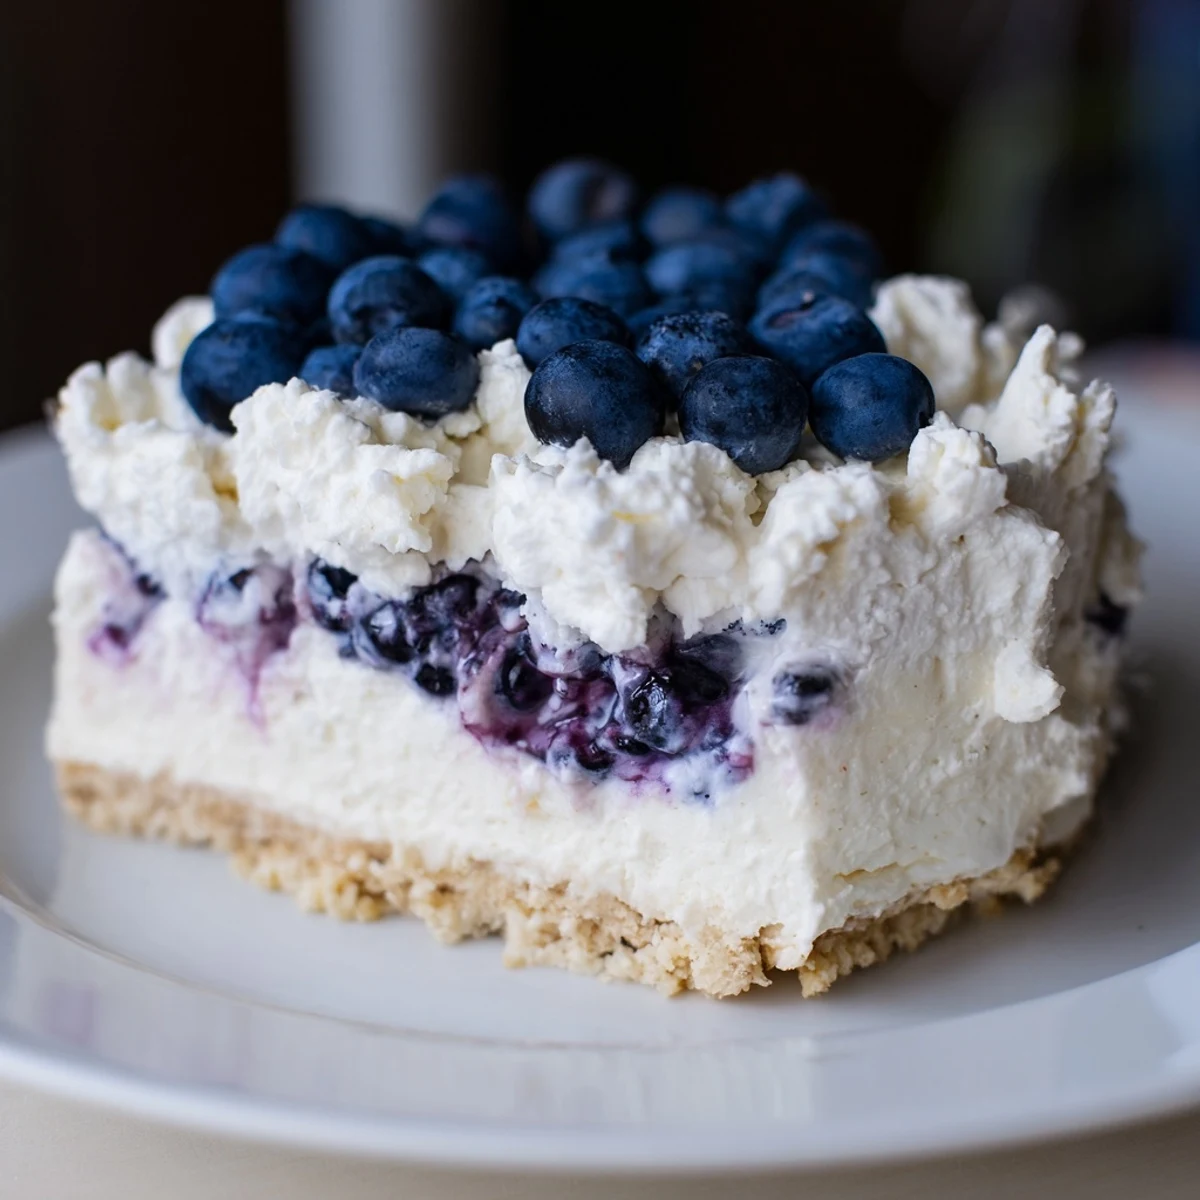
 This decadent dessert features a graham cracker crust, rich cream cheese filling, and light blueberry mousse. The layered treat combines creamy textures with fresh berry flavors, making it perfect for summer gatherings or special occasions. Preparation requires baking and chilling time, resulting in a beautiful, impressive dessert that serves 10.
The first summer I made this blueberry mousse cheesecake was during a heatwave when my kitchen felt like a sauna. I was determined to impress some new neighbors with a dinner party dessert, and halfway through folding whipped cream into the blueberry mixture, I realized I hadn't chilled my springform pan properly. We ended up eating slightly messy slices on the back porch while lightning bugs flickered in the yard, and nobody cared about perfection because the taste was incredible.
Last year I made this for my sister's birthday instead of a traditional cake. She swore off sweets for January but took one look at the jewel-toned layers and asked for the thinnest possible slice. Two slices later, she declared that some occasions deserve exceptions, and we sat at the counter picking at the remaining blueberries on top until way past midnight.
Ingredients
- 200 g graham crackers or digestive biscuits: These create the foundation that holds everything together, and I've found digestive biscuits add a lovely subtle sweetness
- 80 g unsalted butter, melted: The glue that transforms crumbs into a firm crust, and don't skimp on pressing it down firmly
- 2 tbsp granulated sugar: Just enough sweetness in the crust to balance the tangy filling
- 500 g cream cheese, softened: Absolutely must be room temperature or you'll battle lumps forever
- 120 g granulated sugar: Sweetens the cheesecake without overpowering the blueberry layer
- 2 large eggs: Room temperature eggs incorporate more smoothly and prevent curdling
- 1 tsp vanilla extract: Pure vanilla makes a noticeable difference in the background notes
- 120 ml sour cream: This is the secret ingredient that makes the cheesecake tangy and creamy rather than dense
- 2 tbsp all-purpose flour: Just enough to stabilize the filling without making it taste floury
- 200 g fresh or frozen blueberries: Frozen work perfectly fine, just thaw them slightly before cooking
- 50 g granulated sugar: Balances the natural tartness of the berries
- 2 tbsp lemon juice: Brightens the blueberry flavor and helps the gelatin work properly
- 1 tbsp water: For blooming the gelatin so it dissolves evenly
- 2 tsp powdered gelatin: This creates that silky mousse texture that holds its shape beautifully
- 250 ml heavy cream, cold: The colder the cream, the faster it whips to perfect peaks
- 100 g fresh blueberries: These fresh gems on top make each slice look like it came from a bakery
- Mint leaves: Optional but they add such a gorgeous pop of color against the purple
Instructions
- Preheat your oven to 160°C (320°F) and line the base of a 23 cm springform pan with parchment paper:
- Do not skip the parchment, and I learned the hard way that running a knife around the edge after baking makes releasing it much less stressful
- Crush the biscuits into fine crumbs and mix with melted butter and sugar:
- I use a food processor but a rolling pin and zip-top bag works beautifully if you need to take out some frustration
- Press the mixture firmly into the base of your pan and bake for 10 minutes:
- Use the bottom of a measuring cup to press it down evenly, and do not worry about small cracks
- Beat the cream cheese and sugar until completely smooth:
- This takes longer than you think, and scrape down the bowl multiple times to avoid any hidden lumps
- Add eggs one at a time, mixing gently after each:
- Overmixing here is what causes cracks, so stop as soon as each egg disappears
- Blend in vanilla, sour cream, and flour until just combined:
- Fold the flour in by hand at the end to prevent activating the gluten
- Pour over the cooled crust and bake for 45 to 50 minutes:
- The edges should be set but the center still wobbles slightly like Jell-O when you gently shake the pan
- Turn off the oven, crack the door, and let the cake cool for 1 hour:
- This gradual cooling prevents sudden temperature shock which causes cracks
- Refrigerate the cheesecake for at least 2 hours:
- This chilling time is non-negotiable for the right texture before adding the mousse
- Combine blueberries, sugar, and lemon juice in a saucepan:
- Cook over medium heat for 5 to 7 minutes until the berries burst and release their juices
- Purée the cooked berries and strain through a fine mesh sieve:
- Press firmly with a spoon to extract every bit of gorgeous purple liquid
- Sprinkle gelatin over water and let bloom for 5 minutes:
- The powder will absorb the water and become wrinkly, then warm gently until completely dissolved
- Stir the dissolved gelatin into the warm blueberry purée:
- Make sure the purée has cooled slightly so the gelatin does not clump up
- Let the blueberry mixture cool completely to room temperature:
- I put it in the fridge for about 15 minutes, stirring occasionally to prevent a skin from forming
- Whip the cold heavy cream to stiff peaks:
- Lift the beater and the cream should hold its shape without flopping over
- Gently fold the cooled blueberry mixture into the whipped cream:
- Add the blueberry mixture in thirds and use a spatula to fold from the bottom up
- Spread the mousse evenly over the chilled cheesecake:
- Work gently so you do not deflate all the air you just folded in
- Refrigerate for at least 2 more hours until completely set:
- The mousse should wiggle like a firm pudding when you gently shake the pan
- Decorate with fresh blueberries and mint leaves just before serving:
- Arrange them in concentric circles or pile them in the center for a more rustic look
 Pin It
 This recipe became my go-to the summer my daughter graduated and we hosted family from three different states. My uncle who claims he does not like dessert went back for seconds, and I found my cousin carefully scraping purple mousse off the serving spoon when she thought nobody was watching.
Getting That Perfect Cheesecake Texture
I spent years fighting with cracked cheesecakes until a pastry chef told me about the oven-door cooling method. The gradual temperature change prevents the dramatic shrinkage that causes surface cracks. Now I actually look forward to that quiet hour when the cake sits in the cooling oven, and my kitchen smells like vanilla and warmth.
Working With Gelatin
Gelatin intimidated me for years because I once ended up with grainy, lumpy mousse. The trick is letting it bloom properly in cold water before heating it, and never letting it boil. I also learned that adding gelatin to something too hot can cause it to clump immediately, so timing the temperature right is everything.
Make Ahead And Storage
This cheesecake actually tastes better on day two when the flavors have had time to become friends. I have made it up to three days ahead, kept it covered in the refrigerator, and it was still perfect. The crust stays crisp and the mousse maintains its airy texture beautifully.
- Use a knife dipped in hot water to get clean slices that show off the layers
- Let refrigerated cheesecake sit at room temperature for 15 minutes before serving
- The mousse layer firms up even more overnight if you need to transport it
 Pin It
 There is something deeply satisfying about slicing into this cake and seeing those distinct layers. Every time I serve it, someone asks for the recipe, and I smile knowing how much easier it is than it looks.
Recipe FAQs
- → Can I make this cheesecake ahead of time?
-
Yes, this cheesecake can be prepared 1-2 days in advance. The chilling time helps it set properly, and it actually tastes better when made ahead. Store it covered in the refrigerator until ready to serve.
- → What's the best way to serve this cheesecake?
-
Serve chilled, garnished with fresh blueberries and mint leaves. For an extra touch, you can drizzle with a light berry sauce or serve with a side of whipped cream.
- → Can I use frozen blueberries for the mousse?
-
Yes, frozen blueberries work perfectly for the mousse. Thaw them first and follow the same preparation method. The texture will be slightly different but still delicious.
- → How do I prevent cracks in the cheesecake?
-
To prevent cracks, bake at the recommended temperature, avoid overbaking, and let the cake cool gradually in the oven with the door cracked. A slow cooling process helps prevent sudden temperature changes that cause cracking.
- → Is this cheesecake suitable for vegetarians?
-
Yes, this cheesecake is vegetarian as it contains no meat products. However, it does contain dairy and eggs, so it's not suitable for vegans.
