 Pin It
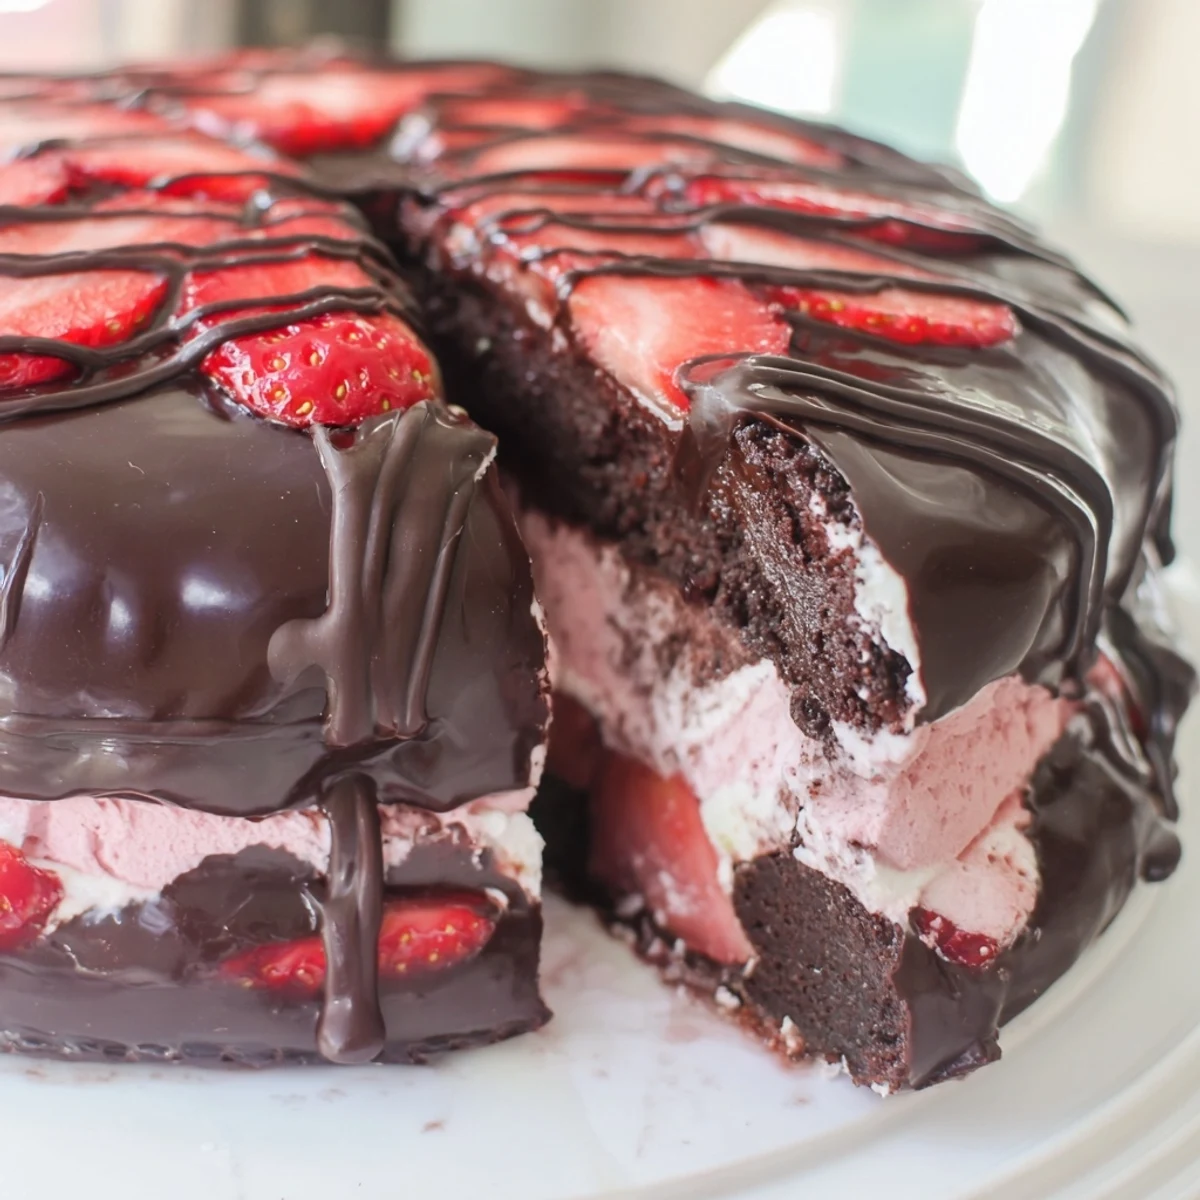
 This impressive frozen dessert combines three beloved treats into one showstopping centerpiece. A tender chocolate cake base supports a thick layer of strawberry ice cream, all enveloped in a signature crackling chocolate shell. The contrast between cold, creamy ice cream and crisp chocolate creates an irresistible texture combination that's both refreshing and indulgent.
While the total time includes several hours of freezing, active preparation is straightforward and achievable for bakers of all skill levels. The springform pan makes assembly simple, while the chocolate shell provides both visual appeal and that satisfying snap when sliced.
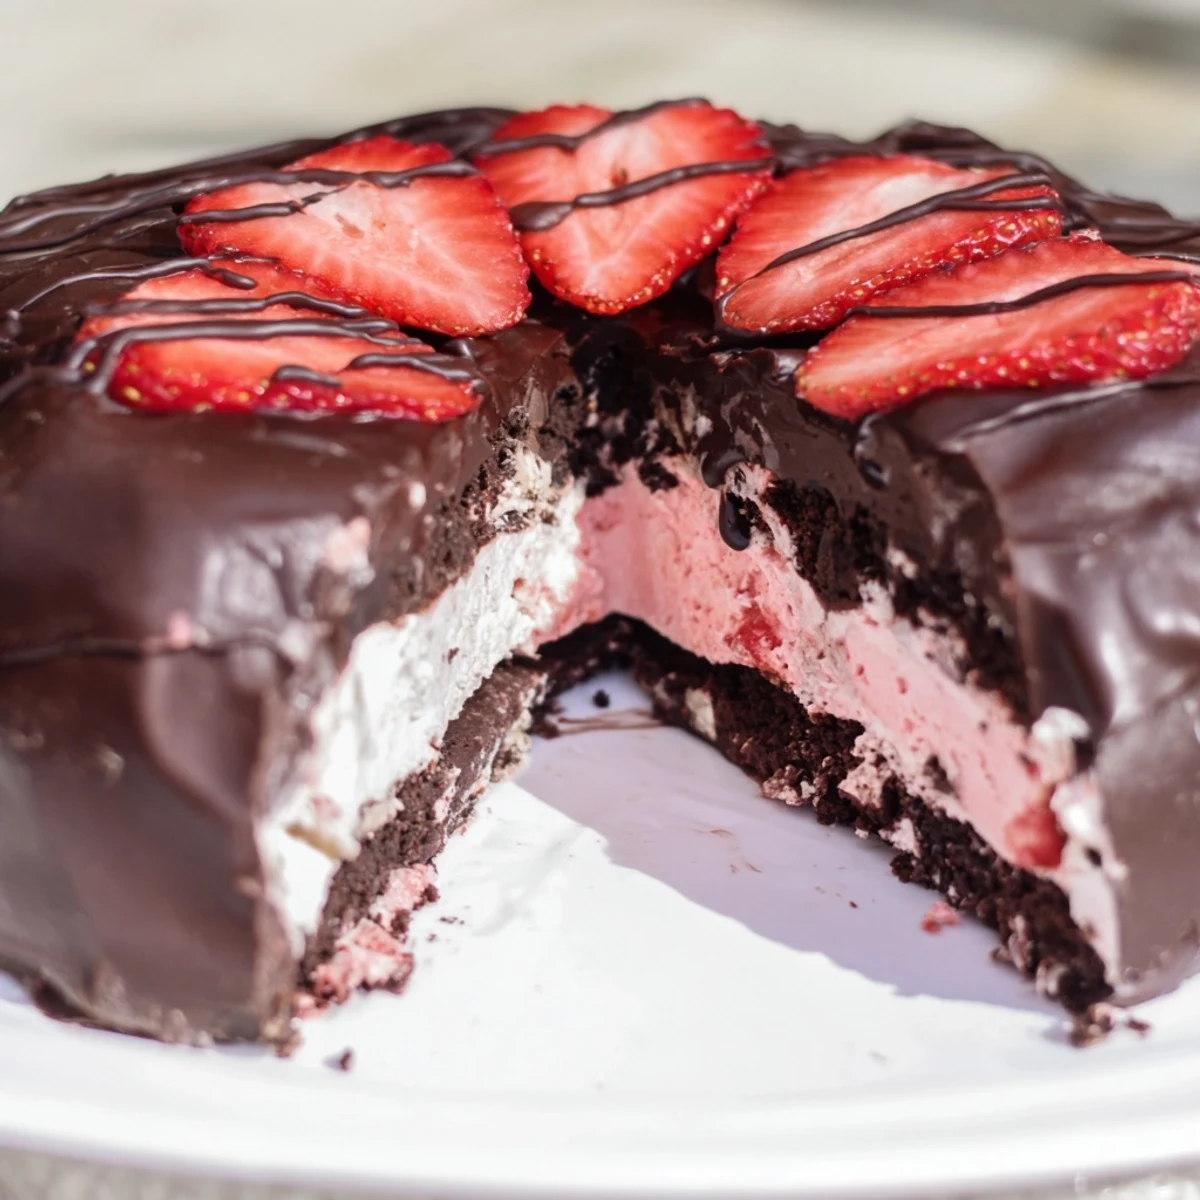
The final dessert yields twelve generous servings, making it ideal for summer gatherings, birthday celebrations, or any occasion that calls for something extraordinary. Fresh strawberry garnish adds bright color and complements the frozen sweetness perfectly.
The summer I turned twelve, my sister got married in our backyard. I remember standing on a chair, watching my mom assemble what felt like the worlds most elaborate dessert station. She made this ice cream cake that disappeared faster than the bride and groom danced their first dance. Now every time I break out that springform pan, I'm back in that garden, watching fireflies and waiting for cake.
Last July I made three of these for different birthday parties because word travels fast. The best moment was watching my friend Sarah take her first bite and immediately demand the recipe for her daughters graduation. There is something universally wonderful about ice cream cake that makes people forget their table manners.
Ingredients
- 1 cup all-purpose flour: The foundation of your chocolate layer, dont pack it down when measuring
- 1/3 cup unsweetened cocoa powder: Sift this to avoid any stubborn lumps in your cake
- 1 tsp baking powder: Helps the cake rise just enough to support all that ice cream
- 1/2 tsp baking soda: Works with the cocoa to create the tenderest crumb
- 1/4 tsp salt: intensifies the chocolate flavor without making it taste salty
- 1/2 cup unsalted butter, softened: Room temperature is non negotiable here for proper creaming
- 1 cup granulated sugar: Creates that delicate cake structure we need
- 2 large eggs: Also bring these to room temperature for better incorporation
- 1 tsp vanilla extract: Pure vanilla makes a noticeable difference here
- 1/2 cup whole milk: Full fat is worth it for moisture and richness
- 1.5 quarts strawberry ice cream: Let it soften for 15 minutes before spreading or you will regret it
- 2 cups semi-sweet chocolate chips: Quality matters since this becomes the star topping
- 1/4 cup coconut oil: Creates that signature snap when the shell sets
- 10-12 fresh strawberries: Hull them right before garnishing so they stay fresh
- 2 oz dark chocolate: Optional drizzle but honestly worth the extra step
Instructions
- Get your oven and pan ready:
- Preheat to 350°F and grease a 9 inch springform pan with butter, then line the bottom with parchment paper. This pan is your best friend because the sides release without destroying your masterpiece.
- Whisk the dry team:
- In a medium bowl, combine flour, cocoa powder, baking powder, baking soda, and salt. Give it a good whisk to aerate everything evenly.
- Cream butter and sugar:
- Beat softened butter and sugar until its pale and fluffy, about 3 minutes. This step is worth the arm workout or electric mixer noise.
- Add the eggs:
- Drop in eggs one at a time, beating well after each addition, then mix in the vanilla. Scrape down the bowl to catch any pockets of unincorporated butter.
- Combine wet and dry:
- Add dry ingredients to the butter mixture, alternating with milk, starting and ending with the dry ingredients. Mix until you just see the last streaks of flour disappear.
- Bake the foundation:
- Pour batter into your prepared pan, smooth the top, and bake for 22 to 25 minutes. A toothpick should come out clean but the cake will still be fudgy and dense.
- Let it cool completely:
- Cool the cake right in the pan on a wire rack. This is crucial because warm cake will instantly melt your ice cream layer.
- Spread the ice cream:
- Pile softened strawberry ice cream over the cooled cake and smooth it with an offset spatula. Work quickly because the cake starts acting as an insulator.
- Freeze until firm:
- Freeze for at least 3 to 4 hours or until the ice cream layer is rock solid. Overnight is even better if you are planning ahead.
- Make the chocolate shell:
- Melt chocolate chips and coconut oil together in 30 second microwave intervals, stirring between each. Let it cool slightly so it is not hot when it hits the ice cream.
- Release and pour:
- Run a knife around the edge, release the springform, and transfer to a serving plate. Pour that gorgeous chocolate mixture over the top and spread it fast before it starts setting.
- Final freeze and serve:
- Freeze for 30 minutes more to set the shell completely. Let it stand at room temperature for 10 minutes before slicing so the chocolate softens slightly.
 Pin It
 The first time I served this at a dinner party, there was actual silence when the chocolate shell cracked. My friend David said it sounded like satisfaction. That sound became my favorite part of making this cake.
Making It Ahead
This dessert is basically designed for advance preparation. You can bake the chocolate cake up to two days ahead and wrap it tightly in the pan. The entire assembled cake freezes beautifully for up to a week, though the fresh strawberry garnish is best added within a day of serving.
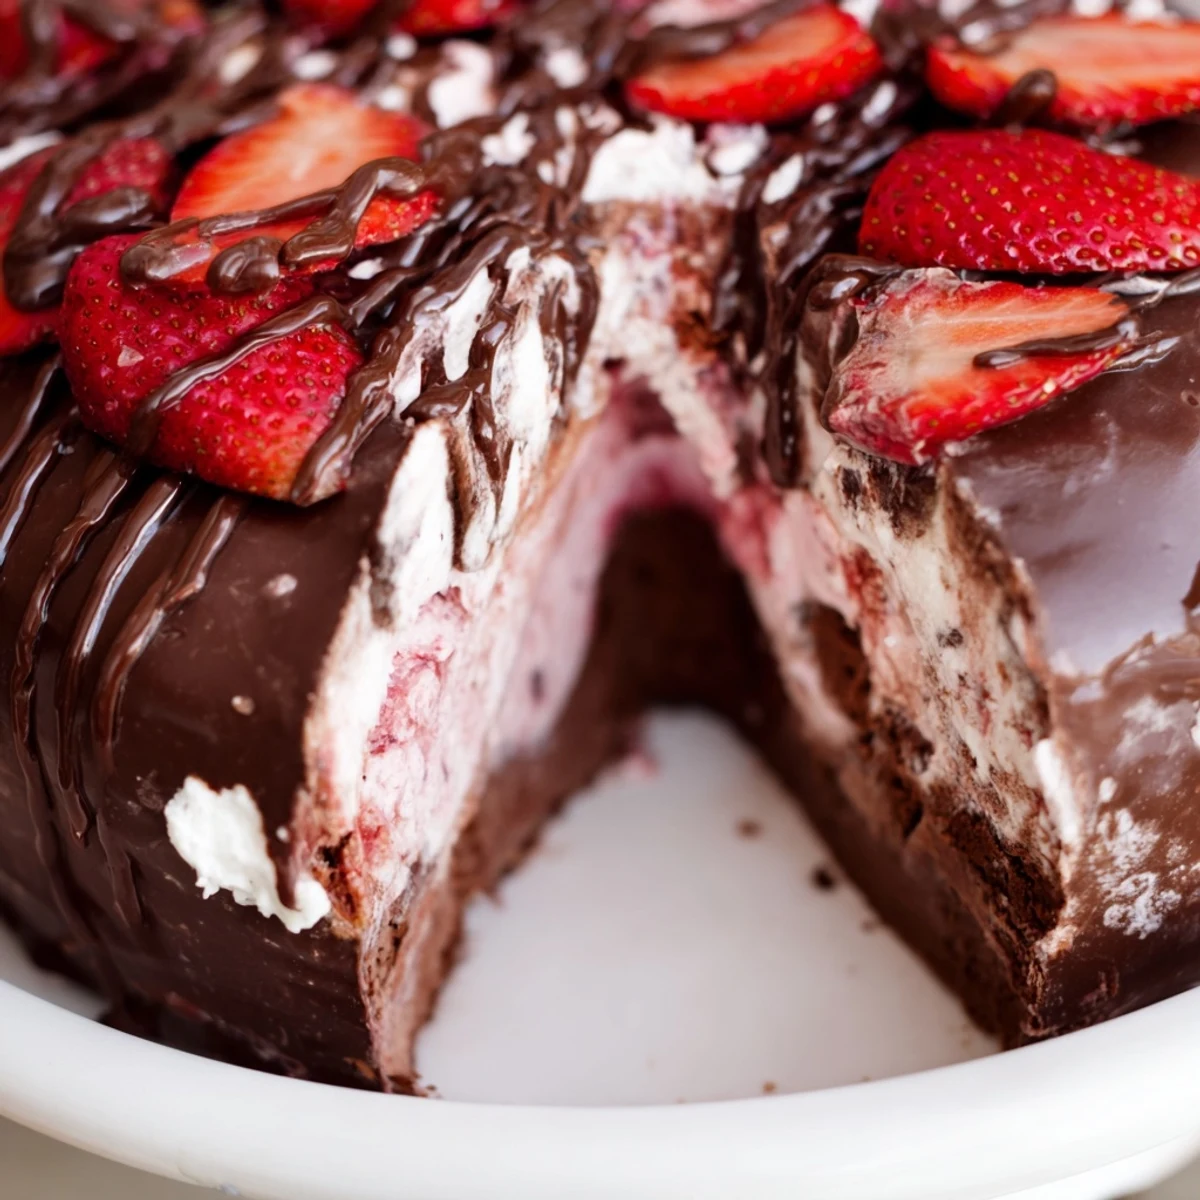
Getting That Perfect Shell
The coconut oil in the chocolate shell is what creates that restaurant quality snap. If you want an even thinner shell, pour slowly and tilt the pan to encourage the chocolate to drip down the sides. Work methodically but quickly once you start pouring.
Serving Strategy
I like to move this cake from freezer to fridge 30 minutes before serving. It softens just enough for easier slicing while maintaining that impressive structure. Have your serving platter ready because you will want to transfer immediately after the final freeze.
- Warm your knife under hot water between every slice
- Keep leftover cake in the freezer with a piece of parchment over the top
- If the shell cracks before serving, call it rustic and drizzle more chocolate
 Pin It
 Every time I pull this out of the freezer, I remember that summer wedding and how something so simple became such a memory. Hope it brings that same magic to your table too.
Recipe FAQs
- → Can I use different ice cream flavors?
-
Absolutely. While strawberry creates a classic chocolate-covered fruit profile, vanilla, mint, or raspberry ice cream work beautifully. The key is ensuring the ice cream is softened enough to spread but not melted.
- → How far in advance can I make this?
-
The assembled dessert freezes exceptionally well for up to one week when wrapped tightly in plastic wrap and foil. Add the chocolate shell and fresh garnish no more than two days before serving for optimal texture and appearance.
- → Why add coconut oil to the chocolate shell?
-
Coconut oil creates that signature crackling effect when the chocolate sets. It lowers the melting point slightly, ensuring the shell remains firm but not rock-hard, and helps the chocolate release cleanly from the spoon during pouring.
- → What if I don't have a springform pan?
-
A standard 9-inch cake pan lined with parchment paper works, though removing the frozen dessert becomes trickier. Run warm water around the outside briefly, then invert onto a serving plate. Springform pans are highly recommended for easier release.
- → Can I make the cake layer ahead of time?
-
Yes, bake the chocolate cake up to two days in advance. Wrap cooled cake tightly in plastic wrap and store at room temperature. The day before serving, soften the ice cream, assemble, and freeze according to instructions.
