 Pin It
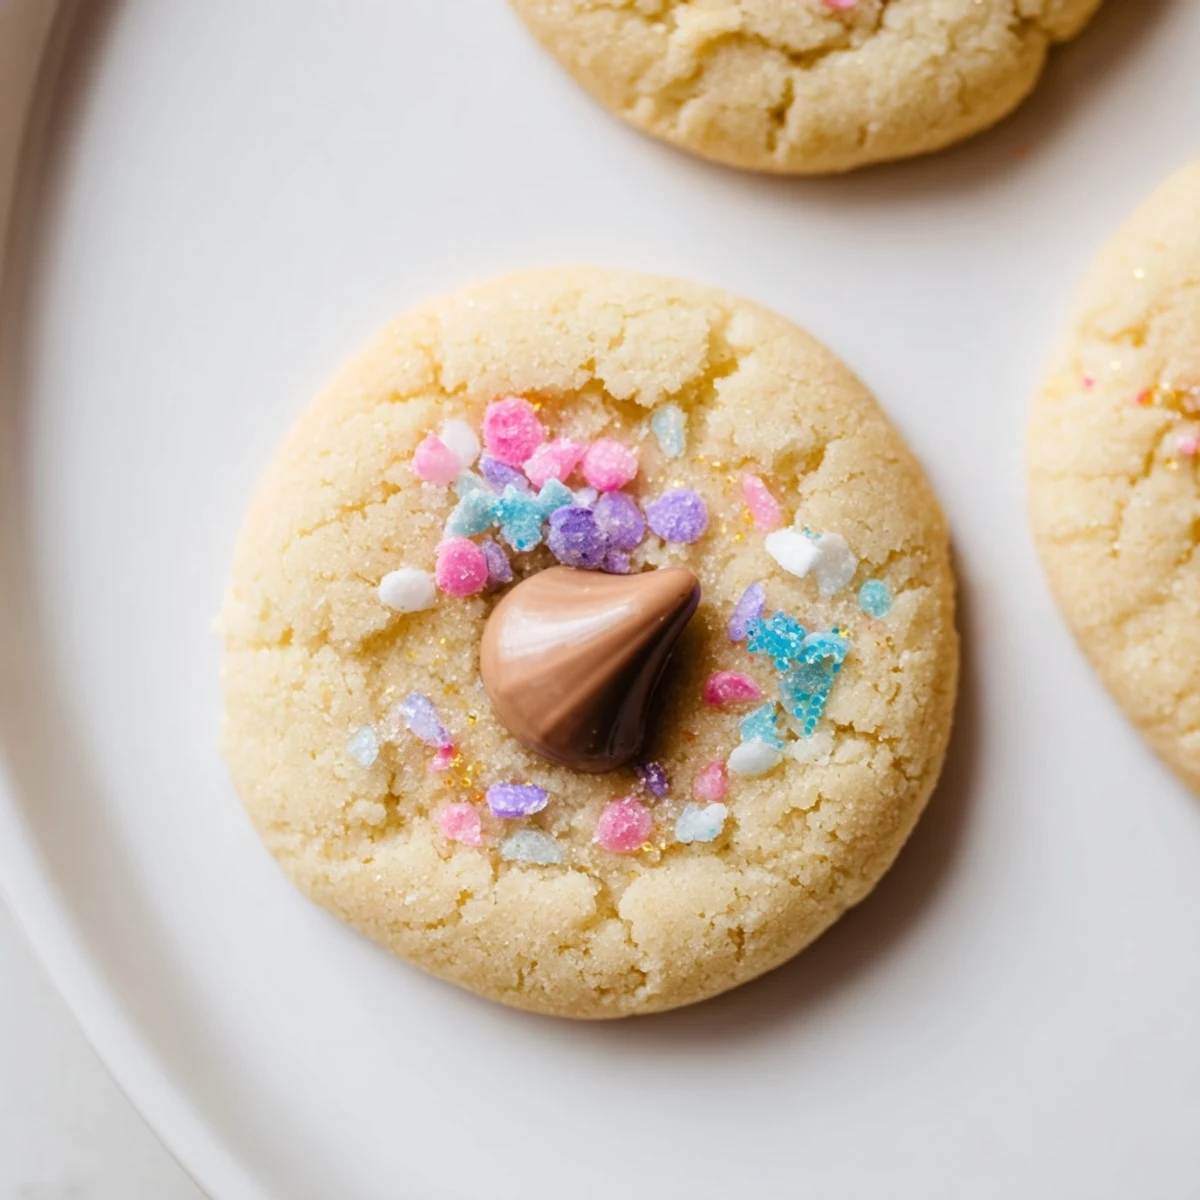
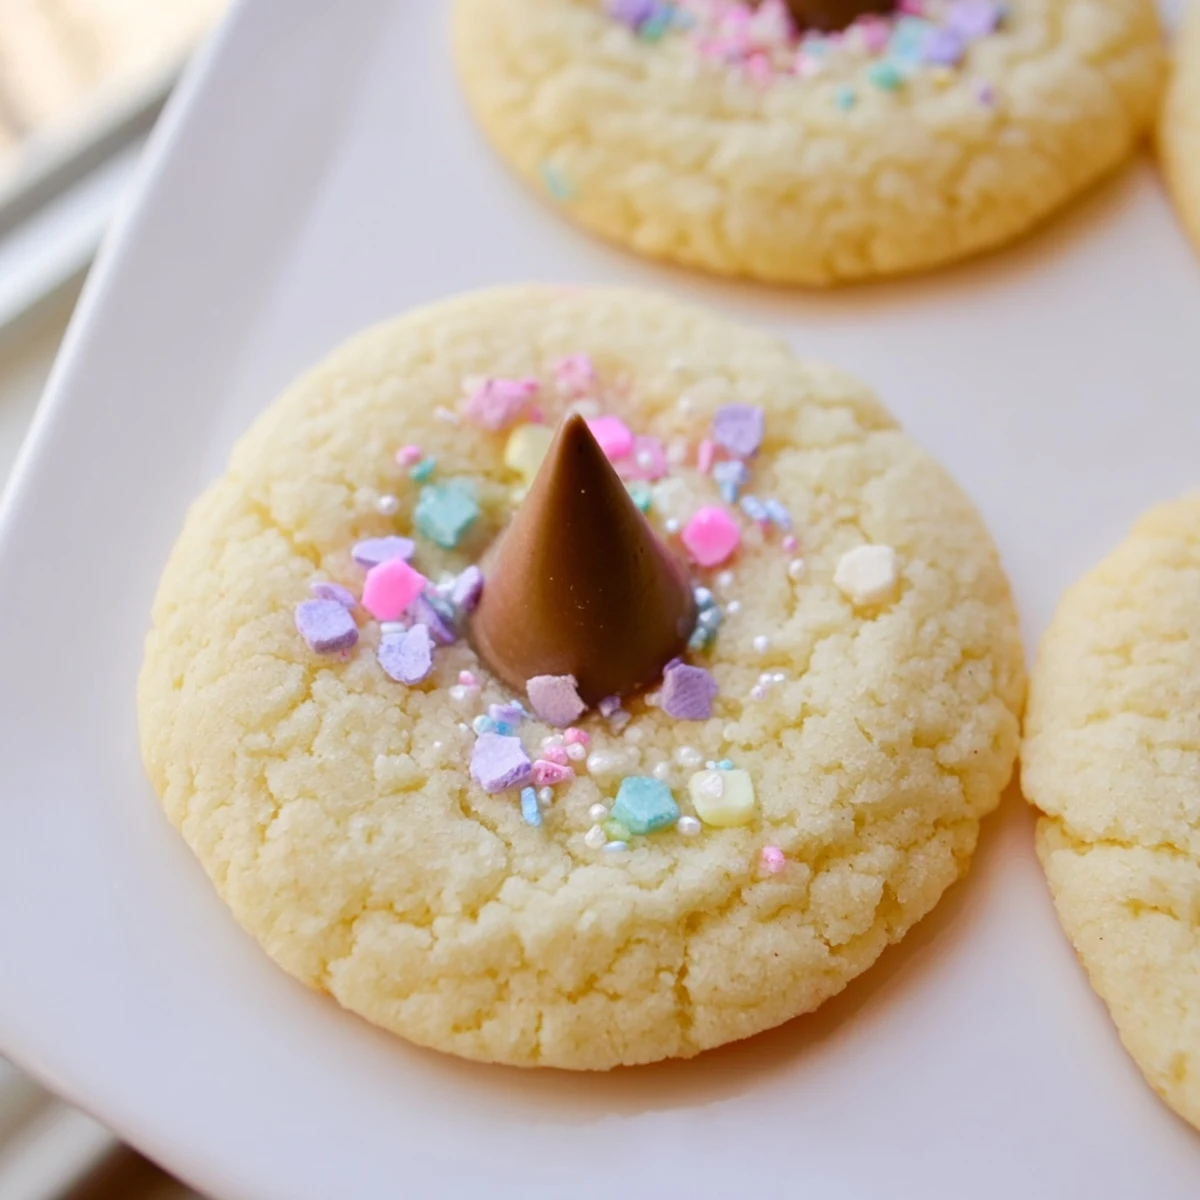
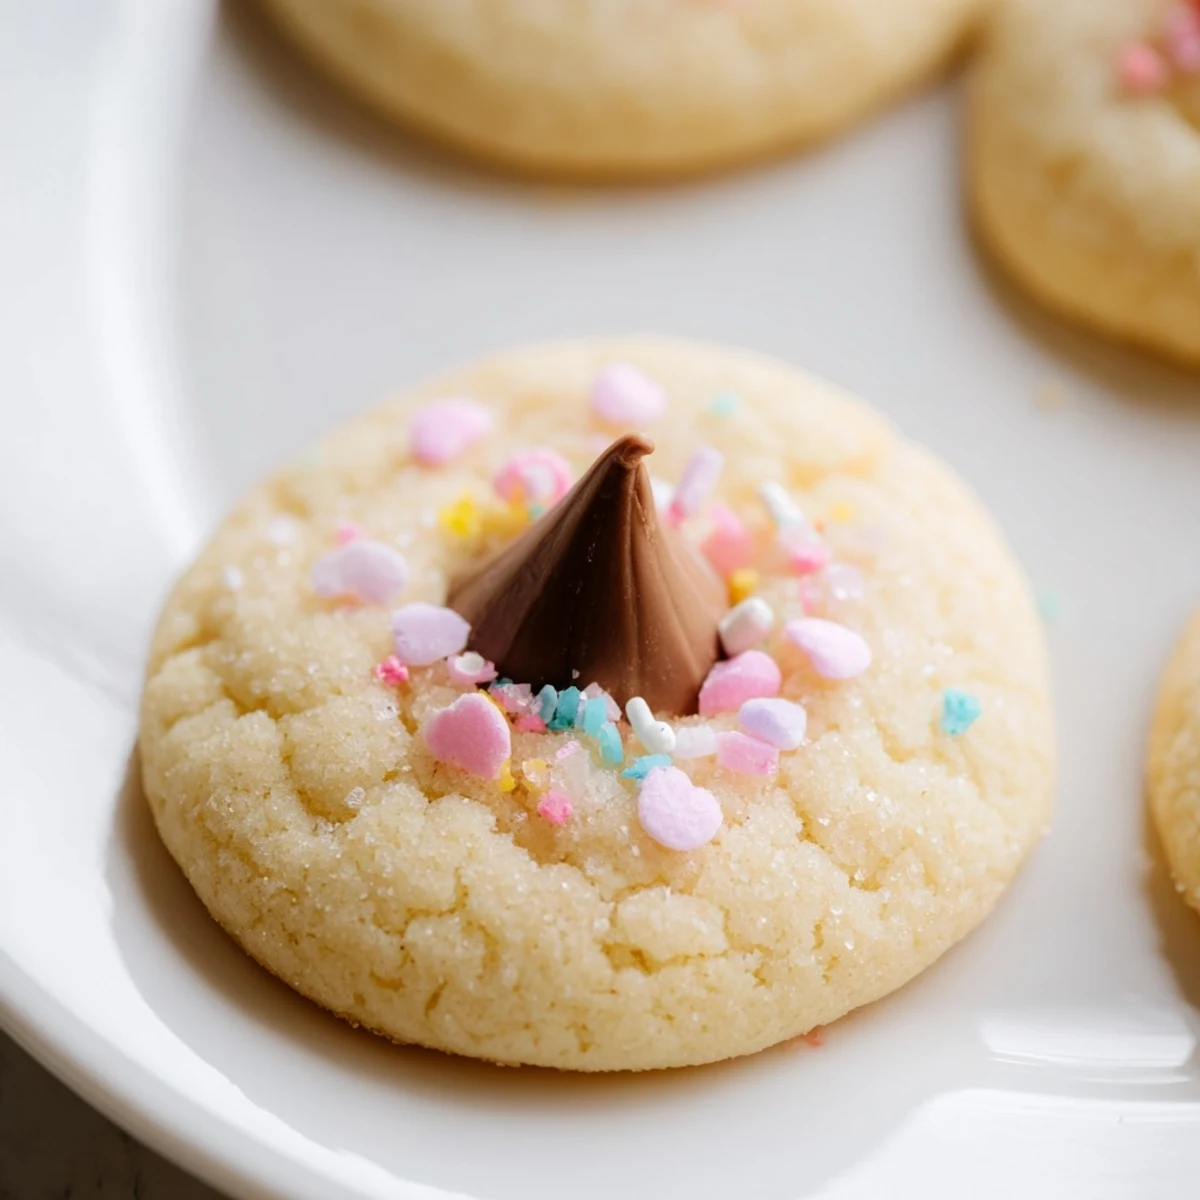
 These delightful Easter blossom cookies feature a soft, buttery base rolled in festive sprinkles and topped with chocolate kisses. The dough comes together quickly with pantry staples, and the surprise chocolate center creates a perfect sweet finish. Ideal for spring parties, holiday gatherings, or as a thoughtful homemade gift.
My daughter grabbed three different pastel sprinkles from the baking aisle and announced we were making Easter cookies for her class party. I had exactly twenty minutes between school pickup and soccer practice to pull something together. These buttery cookies with chocolate kisses became our solution, and the way the chocolate melts into the warm centers makes them impossible to resist.
Last year I made these for our neighborhood egg hunt, and watching three different dads sneak back for seconds convinced me they are not just for kids. The sprinkles make them look like you spent hours decorating when really the oven does all the heavy lifting.
Ingredients
- 1 cup unsalted butter at room temperature: Cold butter creates flat cookies so let this sit out for at least an hour
- 1 cup granulated sugar: Cream this thoroughly with the butter until the mixture looks pale and fluffy
- 1 large egg: Room temperature eggs incorporate better into the dough
- 2 teaspoons pure vanilla extract: Do not use imitation vanilla because the difference is noticeable in simple cookies
- 2 cups all-purpose flour: Spoon and level the flour rather than scooping directly to avoid packing too much in
- 1/4 teaspoon salt: This balances all the sugar and enhances the butter flavor
- 1/2 teaspoon baking powder: Gives the cookies a gentle lift without making them cakey
- 36 chocolate blossom kisses: Unwrap these before you start baking so you can work quickly when the cookies come out
- Pastel sprinkles or colored sanding sugar: Rolling the dough balls in sprinkles before baking creates that festive cracked edge effect
Instructions
- Preheat your oven to 350°F with parchment paper lined baking sheets ready:
- Position your oven racks in the center so the cookies bake evenly without burning on the bottom
- Cream together the butter and sugar:
- Beat on medium speed for at least three minutes until the mixture turns pale and feels light when you stop the mixer
- Add the egg and vanilla extract:
- Mix until completely combined and scrape down the sides of the bowl to catch any pockets of butter
- Whisk the flour salt and baking powder in a separate bowl:
- Combining the dry ingredients first prevents overmixing when you add them to the wet mixture
- Gradually mix in the dry ingredients on low speed:
- Stop as soon as the flour disappears because overmixing makes tough cookies
- Scoop and roll the dough balls:
- Use a tablespoon scoop then roll each ball between your palms before pressing them into the sprinkles
- Arrange the dough balls two inches apart on your baking sheets:
- These cookies spread so giving them room prevents them from baking into each other
- Bake for eight to ten minutes:
- Pull them out when the edges look set but the centers still appear slightly underdone
- Press a chocolate kiss into each hot cookie immediately:
- Work quickly because the chocolate needs the residual heat to melt slightly into the dough
- Cool completely on the baking sheet for five minutes:
- Moving them too soon makes the chocolate kisses slide off so let them set first then transfer to a wire rack
 Pin It
 My grandmother always said cookies taste better when someone walks into the kitchen while they are baking and these prove her point every single time.
Getting The Right Texture
The difference between a dry cookie and a melt in your mouth experience is watching the edges not the center. Take them out when the edges look firm but the middle still feels slightly soft to the touch.
Sprinkle Strategy
Pour sprinkles into a shallow bowl and roll the dough balls firmly so the sprinkles really stick. The heat from the oven makes them crack slightly which creates that beautiful bakery look.
Storage Secrets
These actually improve after sitting overnight because the flavors meld together. Keep them in a sealed container with a piece of white bread to maintain softness.
- Separate cookie layers with wax paper if you stack them
- Freeze unbaked dough balls for up to three months and bake fresh
- Add sprinkles right before baking if freezing dough
 Pin It
 There is something about a plate of these colorful cookies on the counter that makes the whole house feel ready for spring celebration.
Recipe FAQs
- → Can I make the dough ahead of time?
-
Yes, you can prepare the dough up to 2 days in advance. Wrap it tightly in plastic wrap and refrigerate. Let it soften slightly at room temperature before rolling and baking for best results.
- → What other chocolates work well as centers?
-
While traditional chocolate kisses are classic, you can use white chocolate, caramel-filled, dark chocolate, or even peanut butter cups. Just ensure they're unwrapped and pressed in immediately after baking.
- → Why press the chocolate in after baking?
-
Pressing chocolate kisses into warm cookies creates a slight indentation and helps the chocolate adhere without melting completely. This preserves the kiss shape while ensuring it stays securely in place.
- → How should I store these cookies?
-
Keep them in an airtight container at room temperature for up to 1 week. Place parchment paper between layers to prevent sticking. For longer storage, freeze unfrosted cookies for up to 3 months and add kisses after thawing.
- → Can I freeze the dough?
-
Absolutely! Scoop the dough into balls, freeze on a baking sheet until solid, then transfer to a freezer bag. Bake from frozen, adding 1-2 minutes to the baking time. Roll in sprinkles before freezing for best results.
